


How to enable the out of office feature in Outlook
- December 8, 2023
- 0
There are few companies that can function smoothly without email. This form of communication is so deeply rooted in professional life that it is taken for granted. If


9621 Agnes Crossing, Lake Suzanneview, New Mexico Island 84604-9295.
There are few companies that can function smoothly without email. This form of communication is so deeply rooted in professional life that it is taken for granted. If


There are few companies that can function smoothly without email. This form of communication is so deeply rooted in professional life that it is taken for granted. If you would like to check your inbox less for a few days, it is very useful and polite to let us know via an automatic reply. Such a message is (fairly) commonly referred to as Out Of Office, or OOO for short.
Ideally, less access to your mailbox means you’re on vacation and can enjoy an enjoyable vacation. Unfortunately, you may also be sick and even reading email can make your sore throat worse. Another possibility is that you are traveling for work, whether abroad or not. Then it may well be that you are too busy networking or listening carefully to the explanations when you visit the factory.
Please inform people who send you emails during this period with an automatic out-of-office message. Of course, many people don’t realize that you won’t be tethered to your computer or phone for a while. Such a message can be created quickly, but sometimes some thought is required during preparation. Here we will explain how and what to do if you want to do this in Microsoft Outlook.
First, let’s take a look at the desktop app, for the simple reason that it’s the editorial team’s preferred version. We will then also discuss the web version and the mobile app.
Before you can tell everyone that you are going to check your mailbox for a while or hardly at all, you have to open it. On the desktop, simply click the Outlook icon in the taskbar. Isn’t that in there? Then, without receiving any additional money, go to Start and click on Outlook there. We’re fans of the taskbar if you use the app every day.
On the desktop, click “File” in the top left corner, then click “Automatic Replies.” You will immediately see a field in which you can enter almost anything. Select “Send Automatic Replies” and you can compose your message.
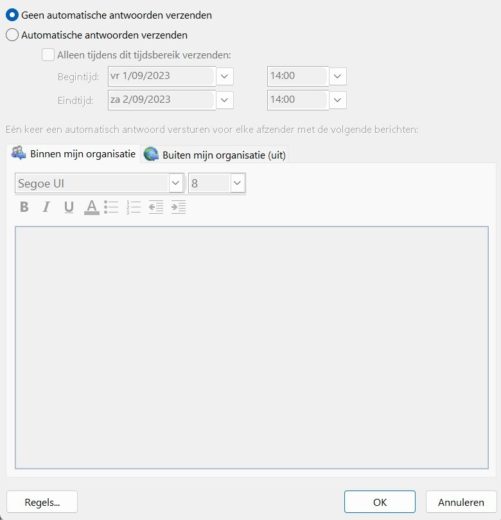
First, you specify that your message should only be sent within a certain period of time, enter a start and end date and do the same for the time.
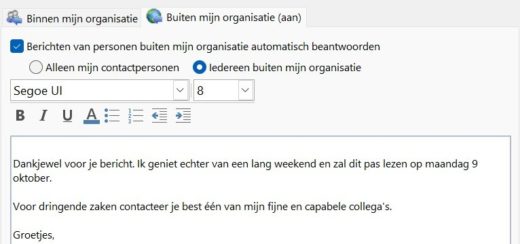
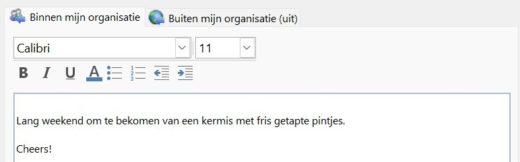
Then comes the best part, the actual text. You can differentiate between one for people inside or outside your organization. Depending on the atmosphere in your company, the first part may be a little more relaxed. That in itself is also a factor for the second one, but it will usually be a bit more formal. For outside your organization, you can distinguish between just your contacts and everyone outside your organization. We recommend that you specify the latter. You never know who will email you if you can’t respond right away.
Read everything carefully again and click OK. Your message will now be ready on the desired days. Click on the arrow at the top left and you will be taken back to your inbox.
We will now briefly discuss the other two options. Much of it works roughly the same as the desktop app, so it’s less extensive.
For the web version, go to the website, click “Login” and enter your email address and password. But many people probably have it in their favorites and just click on it there.
If you would like to find out the way via the mobile app, we will assume that you have already downloaded it. So activate it on your phone or tablet. If the former is not the case, you know what to do.
In both the web version and the mobile app, you have to go through Settings (the familiar gear icon). With the mobile app, you first have to click on your profile photo.
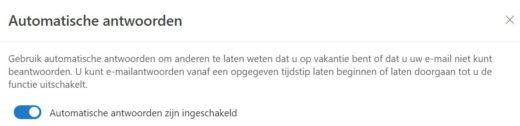
Then go to the “Email” section (web) or select your email account (mobile) and slide the “Automatic replies” button. The mobile app already lets you choose who will see your auto-reply.
Then it’s almost the same as using the desktop app, just in a slightly adjusted layout. You specify the start and end dates and do the same for the time. You then write the text(s) and specify the options for your agenda.
Closing is very simple: with the web version you just have to press X and save, with the mobile app you leave the screen and the system asks you to confirm.
Is your vacation canceled (shame) or have you recovered (hurrah) and is the absence no longer necessary? Then it can be easily switched off again. We list the three versions:
The texts that we have used as examples are of course only examples. Depending on what you want to communicate, you can post a formal message or a very casual message. Maybe a joke if that suits your style.
In case you are “disturbed”, you can consider adding your (work) telephone number to your message, for example for urgent matters. However, this is a consideration that you must make yourself. It’s just an additional option that we don’t want to withhold from you.
If you’re away for more than a few days, your inbox can quickly fill up. For some people it doesn’t have to take that long. If you have the freedom, you can set an additional day for your absence when choosing the end date. This gives you a little more breathing room on the first day to process all the emails that await you on the first day back. But only do this if you have this option and you won’t offend your colleagues.

Source: IT Daily

As an experienced journalist and author, Mary has been reporting on the latest news and trends for over 5 years. With a passion for uncovering the stories behind the headlines, Mary has earned a reputation as a trusted voice in the world of journalism. Her writing style is insightful, engaging and thought-provoking, as she takes a deep dive into the most pressing issues of our time.


