Bookings with me: How to share your availability with external parties in Outlook
February 28, 2024
0
Do you regularly meet with people outside your organization? Then constantly reporting your availability can become hell. Microsoft offers a solution through “Bookings with me” that allows external
Do you regularly meet with people outside your organization? Then constantly reporting your availability can become hell. Microsoft offers a solution through “Bookings with me” that allows external parties to arrange a meeting themselves, but only at times of your choice and if your schedule permits.
Arranging a meeting with a colleague is no problem with Outlook: you can immediately see when everyone is free. It gets even more annoying if you regularly meet with external people: they don’t automatically have access to your agenda. Reporting availability can become a tedious task
Ideally, you can give someone insight into your free moments without having to send endless emails back and forth. Microsoft offers this solution via Bookings with me in Outlook. Use this tool to create a page that you can share with a link. Anyone can schedule meetings on this site, but only at times that suit you.
A notice: Bookings with me is not the same as Microsoft Bookings and focuses on one-on-one meetings. Invoked in Dutch Bookings with me Normal Make a reservation with mebut at the moment Microsoft hardly implements this translation anywhere.
Licensing when booking with me
To create a Bookings with Me page, you need a Microsoft Professional subscription. The following licenses are sufficient:
Office 365: A3, A5, E1, E3, E5, F1, F3.
Microsoft 365: A3, A5, E3, E5, F1, F3, Business Basic, Business Standard, Business Premium
The function is therefore not available for private Microsoft 365 subscriptions.
There are no restrictions on who you can share the page with. Anyone can schedule meetings, with or without a Microsoft account. External users only see what type of meetings they can schedule and what times are available. So you don’t get any real insight into your agenda.
The application itself is quite new and works very well in our tests, although we discovered a small error here and there in the configuration process, which fortunately can be quickly fixed. We’ll go through the entire process step by step and describe what you should pay attention to.
Step 1
Surf to https://outlook.office.com/bookwithme/
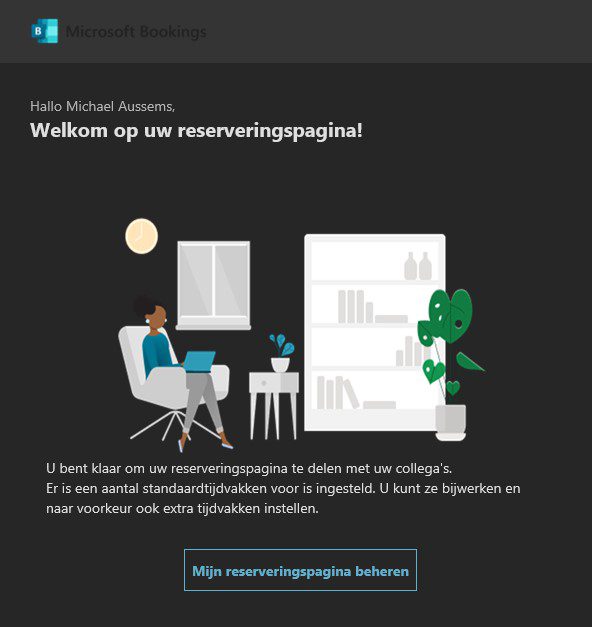
You now need to sign in with your Microsoft 365 Professional account. Once this is done, a welcome screen from Microsoft will appear. In it you will read that some useful startup settings have already been added, but more on that in a moment. click on Understood. Microsoft will also immediately send you an email: Welcome to Microsoft Bookings.
step 2
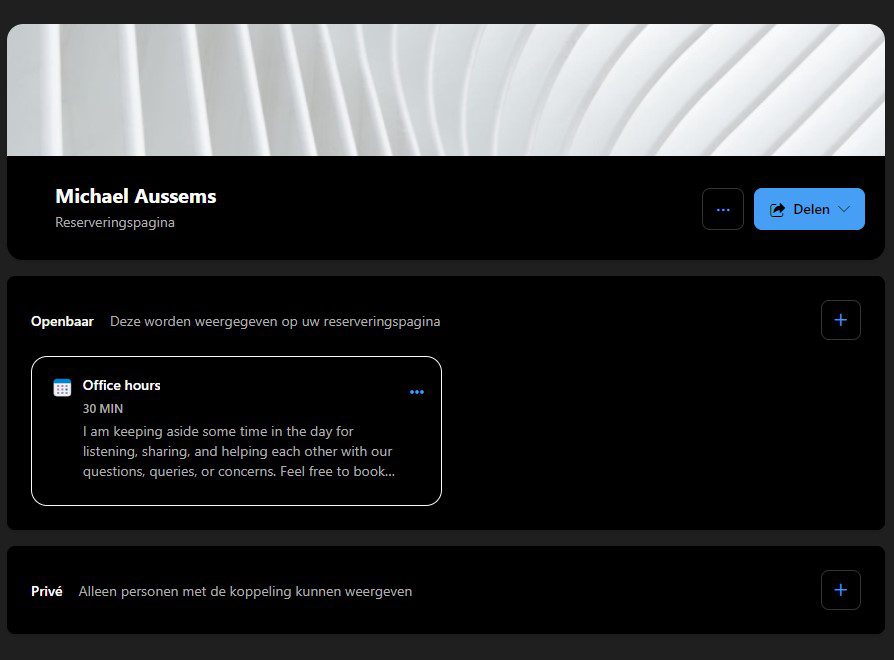
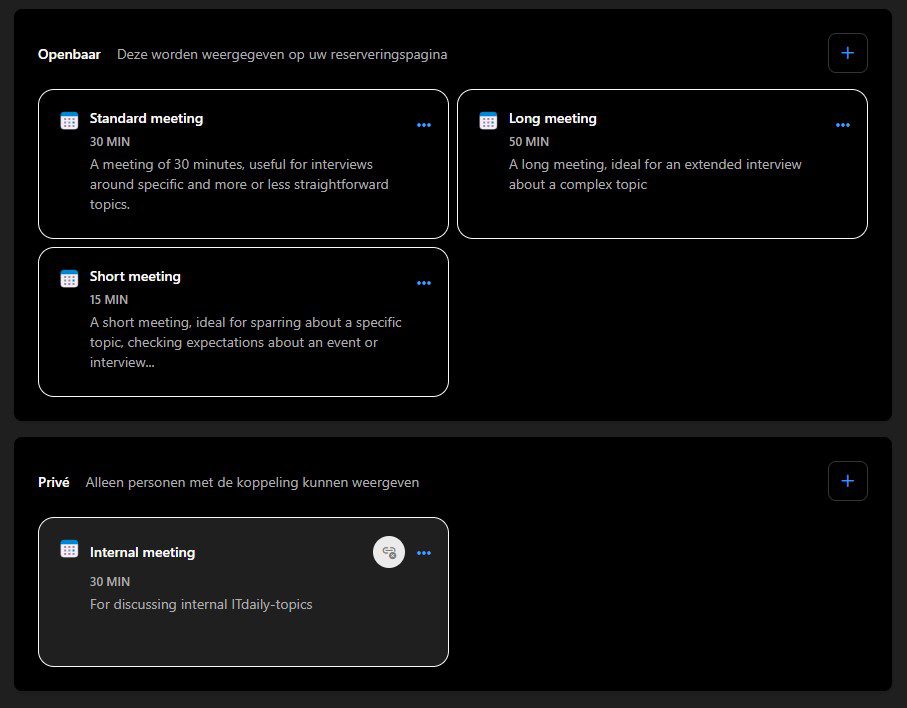
You will now see a fairly empty reservation page. You can create two types of bookable meetings: Private And Public. The public sessions can be viewed by anyone with access to your reservations page. The private meetings are only available to those who have the link. Microsoft has already created a public meeting: Business hours. This is a meeting with a sample text that lasts half an hour.
step 3
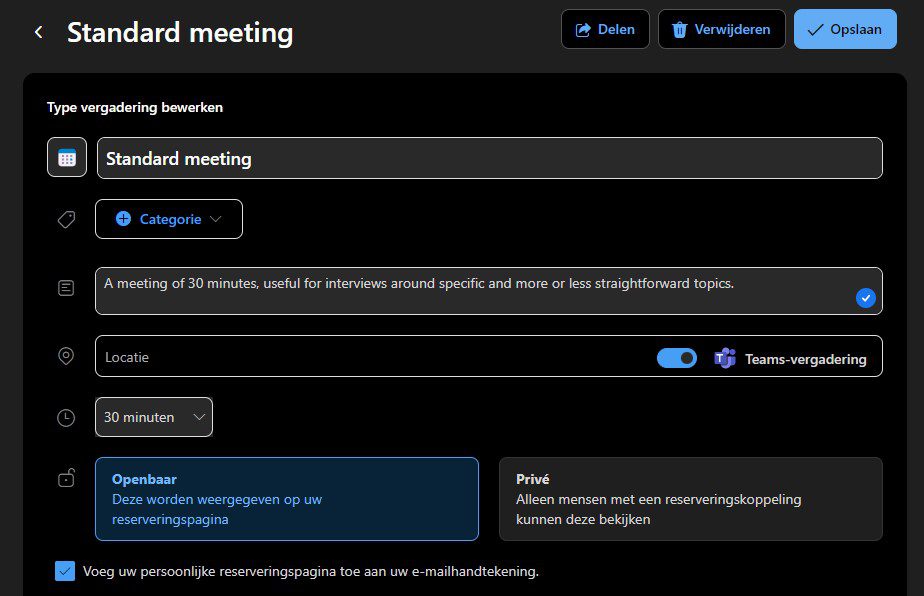
click on Business hoursto customize the meeting. A detailed screen will now appear where you can edit the meeting type. You can choose a name and, if necessary, add the meeting to a category. The categories are synchronized with your Outlook account. There is space for a description below. finch team meeting on or off to indicate whether the meeting can take place digitally. You can also add your personal reservation page to your digital signature here.
Step 4
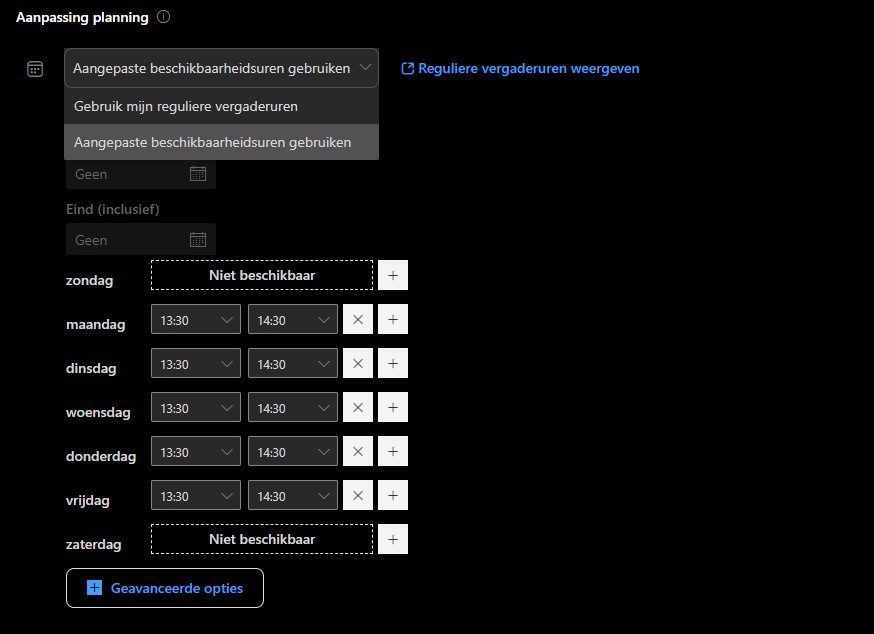
Below you can choose when the meeting can take place. There are two options: either select times tailored to this specific meeting request or click the link View regular meeting times generally specify when you are available. However, this link doesn’t work perfectly for us, so we decide to manually add hours to a meeting. Select for this Use custom availability times.
Step 5
Check here when you are usually available for meetings. People can book between the posted times unless you are busy or told otherwise Reservation page. Adjust the hours as desired and click + to add additional blocks. For example, you state that you do not want to be disturbed during your lunch break. Remember, you don’t have to specify when you work, but you do need to specify when you want to schedule meetings. Is the morning reserved for other tasks? Then don’t add it to your availability.
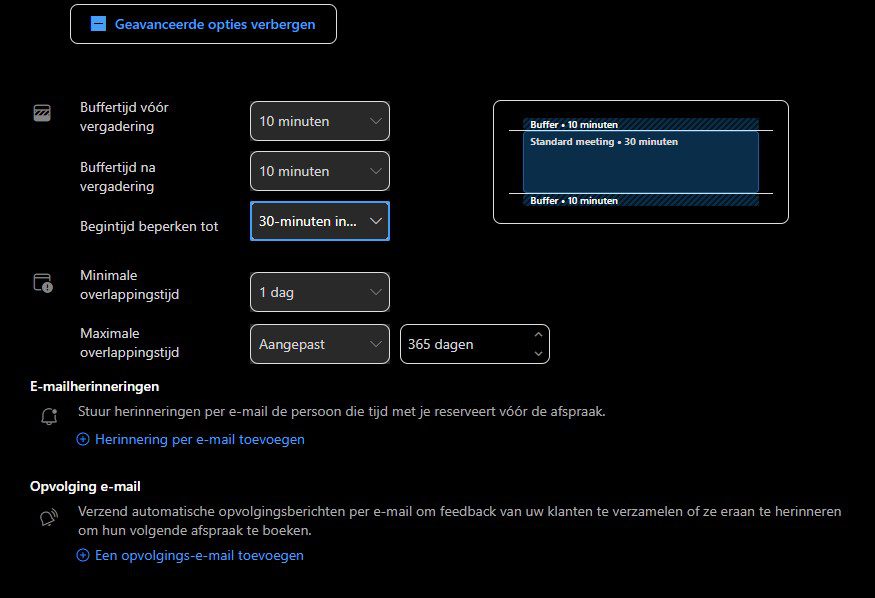
Step 6
Also take a look below Expanded options. There you can edit additional details, such as the buffer time between meetings. You can also send reminder emails to your contacts. Click at the top Save if you are satisfied.
Step 7
On their Reservation page You are now viewing the meeting. External people who land on your page can click on it. Click on that + Right to organize other types of meetings with different objectives or lengths. Click on a meeting to adjust the settings again.
Step 8
Now it’s time for a personal touch. Click on the three dots at the top right and select Edit banner image. Here you can select an image to add some color to your page. Unfortunately, you cannot currently add your own image.
Step 9
Finally, click on the button Split. You have options there. You can come with me Copy link Send a link to the page to the person you want and send an email to immediately Share via emailbut we prefer the option Email signature settings. Click to add a convenient link at the bottom of your signature that will take you directly to the reservation page. You can customize the text of the link to your taste. do not forget it Save Click when finished. Please note: Microsoft does not always automatically sync your signature with your Outlook desktop client. Copy them manually if necessary. You can also add the underlying link to your signature yourself.
Step 10
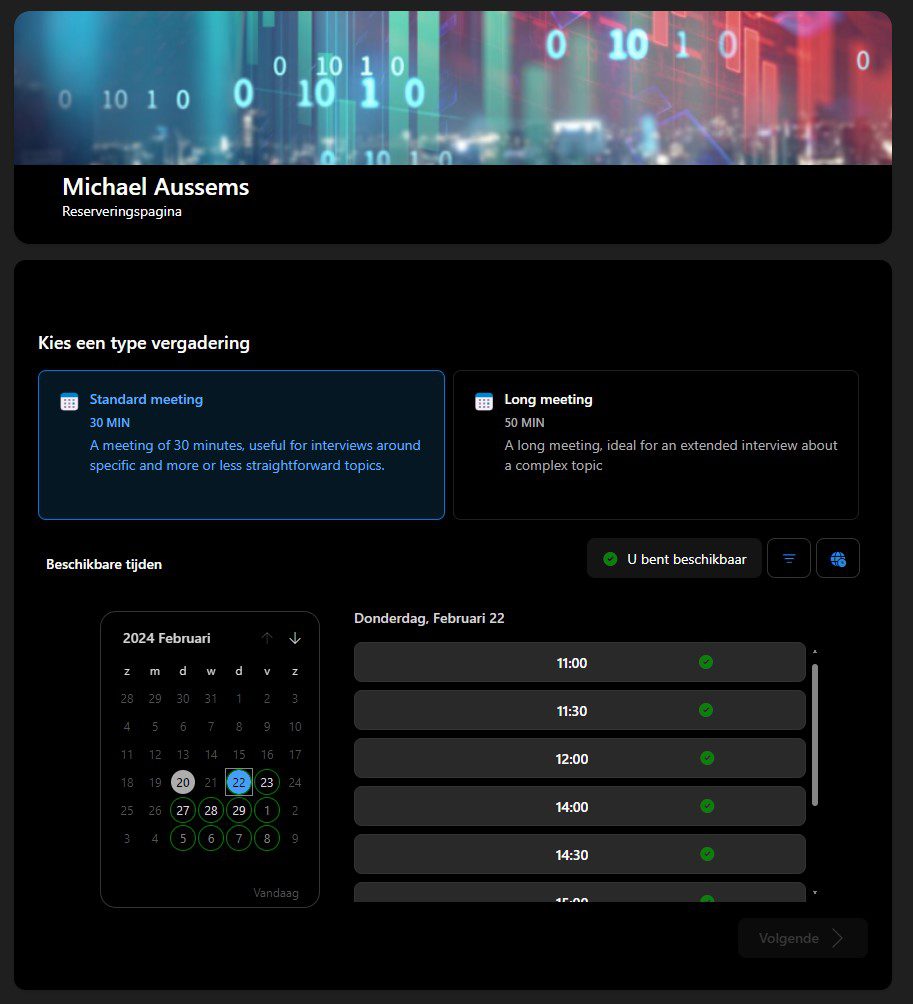
What will your contacts see now? When the link redirects them to your page, all public sessions will be listed. When they click on it, they can choose a time that suits them using a convenient calendar and timesheet. Only moments within the available time will be displayed unless there are other plans in your calendar. Click the link in your signature yourself to check if everything looks correct. You can also go to the top right from here My booking page Click to adjust settings.
Step 11
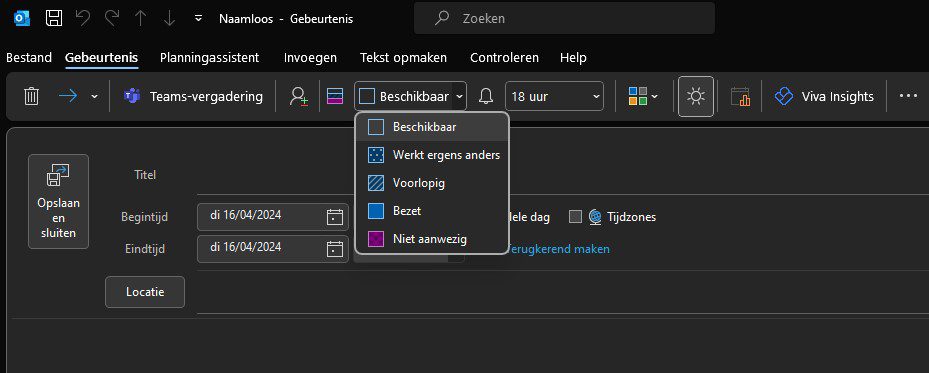
Now you can share your booking link. Make sure you fill out your Outlook calendar promptly from now on. As long as a time slot is available in Outlook, someone can book a meeting using the link to your page. Be sure to pay attention to events in Outlook that take up the entire day. When you create it, Outlook inexplicably identifies you as Available to leave it alone. Also shows the time you are busy as such. It might be useful to know: when Focus time When you book in Outlook, that time immediately becomes unavailable to external parties.
Armed with the knowledge above, you’ll never have to dive into your calendar yourself to list availability when someone asks. Would an outside person want to meet with you? Then just send the link and let them choose a moment that, by definition, suits you too.
As an experienced journalist and author, Mary has been reporting on the latest news and trends for over 5 years. With a passion for uncovering the stories behind the headlines, Mary has earned a reputation as a trusted voice in the world of journalism. Her writing style is insightful, engaging and thought-provoking, as she takes a deep dive into the most pressing issues of our time.