


How to prevent Windows 11 from encrypting storage drives (itself).
- May 9, 2024
- 0
A few days ago, we repeated the information that indicated the automatic enabling of BitLocker and with it the encryption of disk drives in Windows 11 when installing


9621 Agnes Crossing, Lake Suzanneview, New Mexico Island 84604-9295.
A few days ago, we repeated the information that indicated the automatic enabling of BitLocker and with it the encryption of disk drives in Windows 11 when installing
.")
A few days ago, we repeated the information that indicated the automatic enabling of BitLocker and with it the encryption of disk drives in Windows 11 when installing the next version of 24H2, which is now being tested in the beta phase. Although this is a very interesting security feature for mobility professionals and the business segment, its operation has not worked on consumer versions of Windows (on which so far), can be a big problem.
We have already talked about this on other occasions encryption in Windows 11 reduces the performance of storage drives and with him the team in general. And it makes sense when handling encrypted data. Considering that Windows 11 doesn’t perform well when we add BitLocker to it, imagine…
In addition, if it is activated automatically without the user’s knowledge, it may happen that he will not have the necessary decryption keys and therefore will not be able to access the encrypted drives, whether SSD or hard drives. No problem, big problem.
There are several ways to disable BitLocker encryption during Windows installation, either by manually editing the Windows registry during installation or by using third-party applications that leave installers ready. We review them:
A simpler and more permanent solution for any type of Windows 11 installation is to edit the official ISO image. A burning application that you know well because we recommend it whenever we have the opportunity (best for creating Windows installation media) is Rufus.
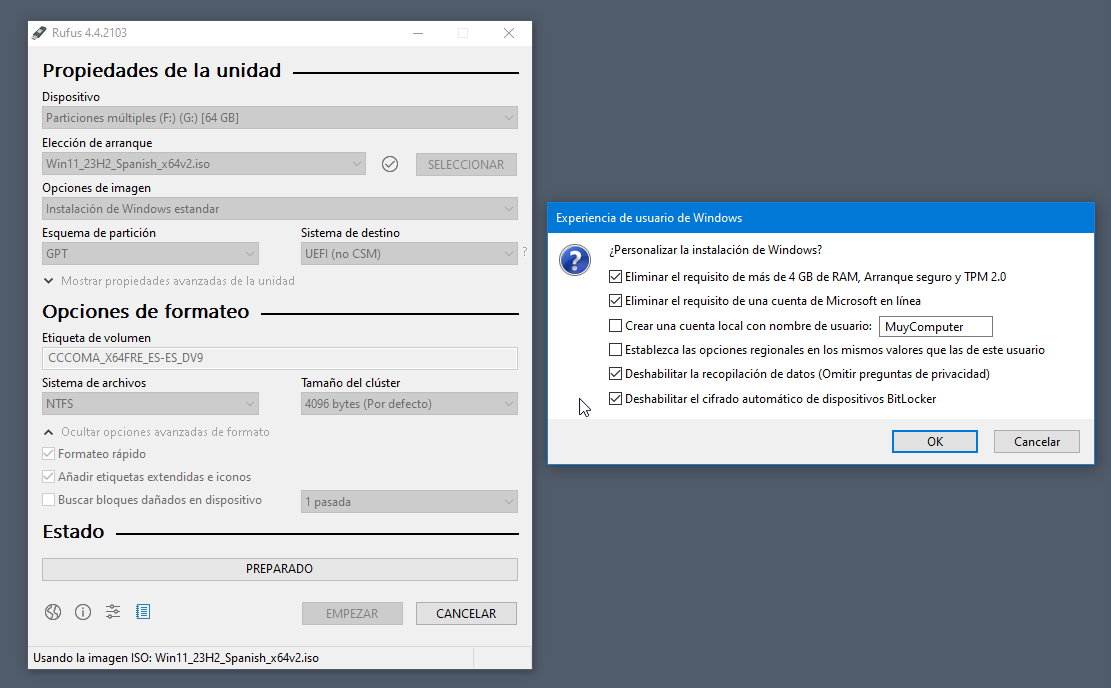
Note that this encryption lock in Windows 11 disables the automatic enablement of BitLocker during system installation, but does not prevent you from using it in the future.

Source: Muy Computer

Donald Salinas is an experienced automobile journalist and writer for Div Bracket. He brings his readers the latest news and developments from the world of automobiles, offering a unique and knowledgeable perspective on the latest trends and innovations in the automotive industry.


