


3 ways to take a screenshot in Windows 11
- April 5, 2023
- 0
Need a quick screenshot of your screen or part of it? Microsoft offers three built-in options with Windows, each with their own benefits. In Windows 11, taking a


9621 Agnes Crossing, Lake Suzanneview, New Mexico Island 84604-9295.
Need a quick screenshot of your screen or part of it? Microsoft offers three built-in options with Windows, each with their own benefits. In Windows 11, taking a


Need a quick screenshot of your screen or part of it? Microsoft offers three built-in options with Windows, each with their own benefits.
In Windows 11, taking a screenshot or screenshot is easier than ever. It is no longer a problem to install additional tools to convert the content of your screen into an image. Microsoft itself offers three useful ways to capture all or part of your screen. You can then edit the screenshot, annotate it, save it as a file, or share it via Teams with the click of a button.
This technique is the simplest, but also the least flexible of all. On Click print screen, PrtSc, Windows 11 automatically takes a screenshot of your entire screen. This screenshot is saved to the clipboard. Good to know: On some keyboards, the key is simply called print screen or Imprécran for those who have stumbled across the language barrier.
You can paste it into a program like Paint to save it as an image, but you don’t have to. Finally, you can instantly paste a screenshot as an image into a variety of programs, including Microsoft Teams. PrtSc followed by ctrl + v: It’s that easy. This technique has one major drawback: you irrevocably record your entire screen.
Click the for the first time PrtScbutton, Microsoft will ask if you want to automatically save the captured image to OneDrive. This way the snapshot is available from anywhere. Those who have a Microsoft 365 account may find this a useful option.
By far the most convenient and comprehensive way to take a screenshot in Windows 11 is with the Snipping Tool. This is a tool that is built into Windows by default. The Snipping Tool allows you to capture images of your entire screen, a single dialog box, or a portion of your selected screen. These images also go straight to the clipboard so you can paste and forward them in a program like Teams. Putting it down at the desired location is also easier than with the first technique. Below we explain in detail how to quickly take a screenshot with the Snipping Tool.
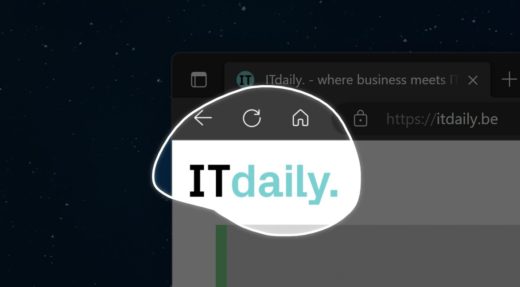
 You can find the Snipping Tool by clicking on begin or Seek Enter the name of the tool, but it is most convenient to open it using the hotkey combination layer + Win + S. The ‘S’ comes from the English name: snipping tool. Your screen will darken slightly and a small bar will appear at the top.
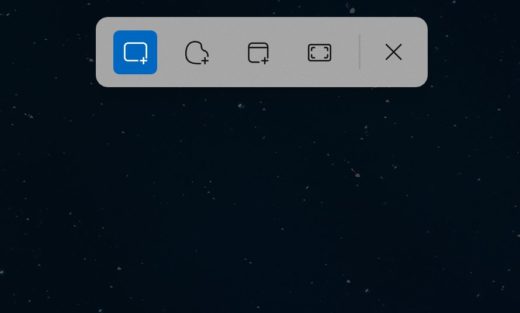
The Snipping Tool is quite powerful and allows you to take screenshots in four ways. The first option on the far left in the bar allows you to open a rectangular field with the mouse. Click anywhere on the screen and Sleep to define the area for the image. As soon as you release the left mouse button, the screenshot is created and is on the clipboard.
The second option works the same, but here you can choose the shape of your screenshot yourself. The third option is to take a screenshot of a dialog box. So you don’t have to cut that out via any of the previous options. If you select this button (the third from the left), you activate the windowed mode. You can now click on a window and Windows 11 will take a picture of it itself. This option is very useful for quickly sharing an image from within a program without adding additional information.
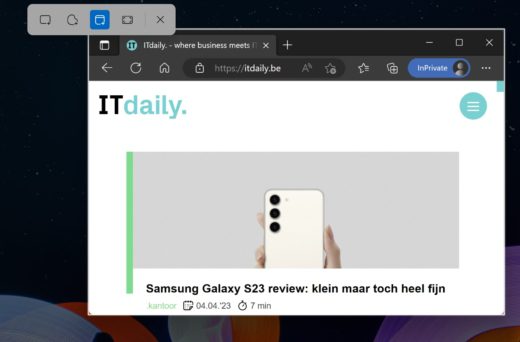
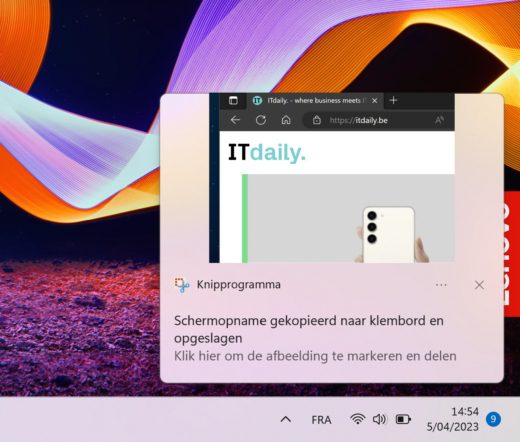 As indicated, a screenshot immediately ends up in the clipboard. Windows 11 also gives a notification on the right that you can click to open the screenshot in the snipping tool itself.
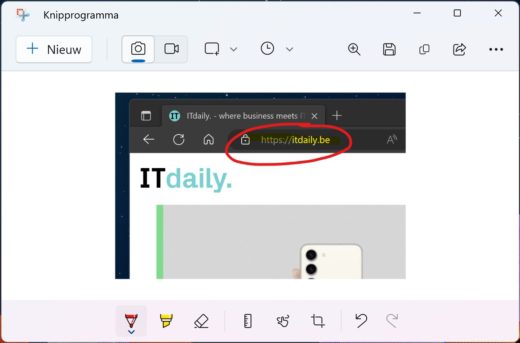
You can quickly make small changes in the snipping tool. For example, highlight text or draw a circle around a point that needs your attention. You can then save the result. This happens by default when pngbut you can too jpeg or poison choose.
You don’t have to be a gamer to use this Xbox game bar use. You can also take screenshots from there. Use the keyboard shortcuts link Win + G to open the tool and click on the camera icon on the left.
That way, your screenshot doesn’t end up on the clipboard right away, and you also don’t get to choose which part of your screen you want to capture. Images are saved under Users > Username > Videos > Recordings.
For us, the Snipping Tool is preferred. Not only can you quickly annotate and the screenshots end up on the clipboard, you can also set Windows to save files automatically. In this case, they end up under Pictures > Screenshots.
Microsoft has long studied what made third-party screenshot tools so popular and distilled the most relevant and powerful features into its own tool. Unknown is unfortunately unloved. Many users only know them PrtScbutton and it doesn’t offer much functionality. The Snipping Tool is a little further away but has all the features one could ask for.
Source: IT Daily
As an experienced journalist and author, Mary has been reporting on the latest news and trends for over 5 years. With a passion for uncovering the stories behind the headlines, Mary has earned a reputation as a trusted voice in the world of journalism. Her writing style is insightful, engaging and thought-provoking, as she takes a deep dive into the most pressing issues of our time.


