Taking photos is one of the most used functions of our phones. We take pictures of things all the time and share them on social media or keep them to ourselves. Ways to make these hundreds of photos we take with iPhones betterYou can use the features we’ll talk about soon to learn more.
It is worth remembering: all these features; It may not be the same on every phone, model or version. If you are using an old model iPhone or have not updated your phone, you may not be able to use all the features below. When you’re ready How to take better photos on iPhone Let’s take it step by step.
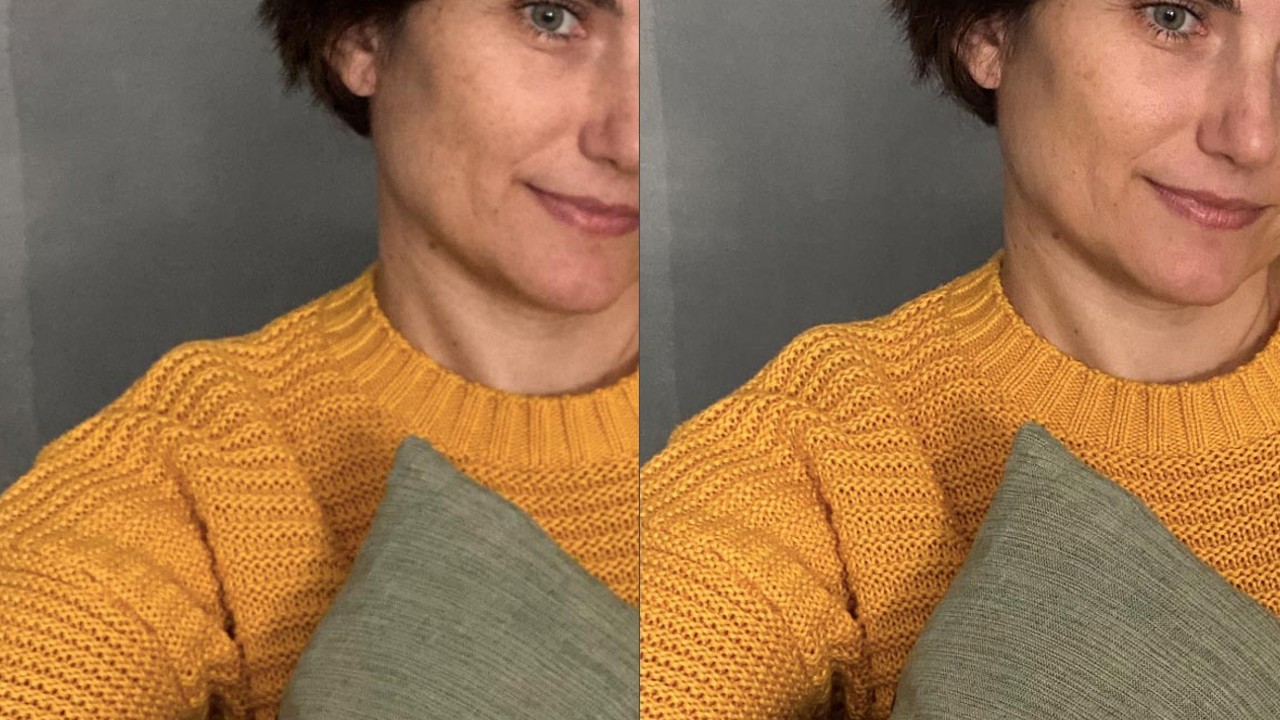
Settings you can specify to take better quality photos with iPhone:
- Use photo styles.
- Use macro control mode.
- Change the aspect ratios of your camera.
- Enable the raster function to create a beautiful composition.
- Unlock AE/AF.
- Adjust the brightness to the desired focal point.
- Use HDR correctly.
- Enable the mirror setting for the front camera.
- Use the Deep Fusion function.
- Bonus: Keep settings.
Use photo styles.
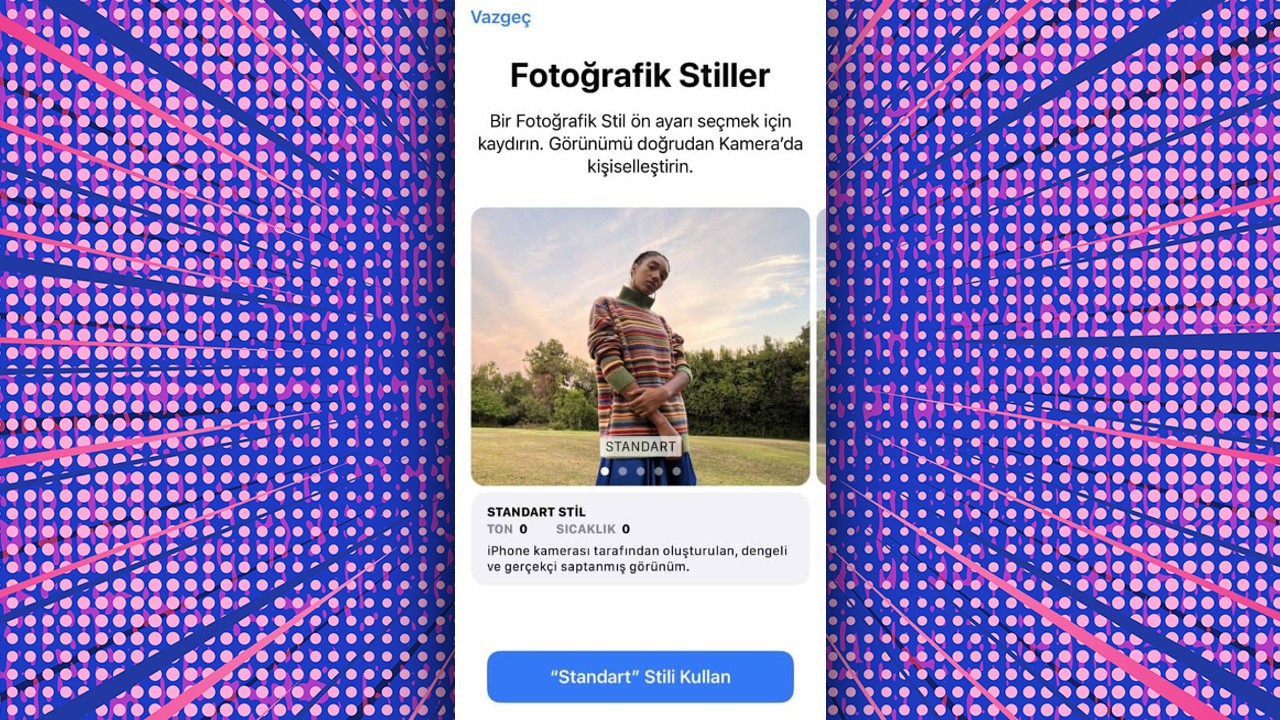
Photo styles you can use on supported models: rich contrast, vibrant, warm or cold let you choose. You can then personalize it a little more by adjusting the tone and temperature values. To use the photographic style selection feature and take more beautiful photos with your iPhone, you can follow the steps below:
Settings > Camera > Photographic styles
or
Slide the shutter button up. > What looks like three squares in a row Tap the fourth icon from the left. > Swipe horizontally to choose the style you want.
Use macro control mode.
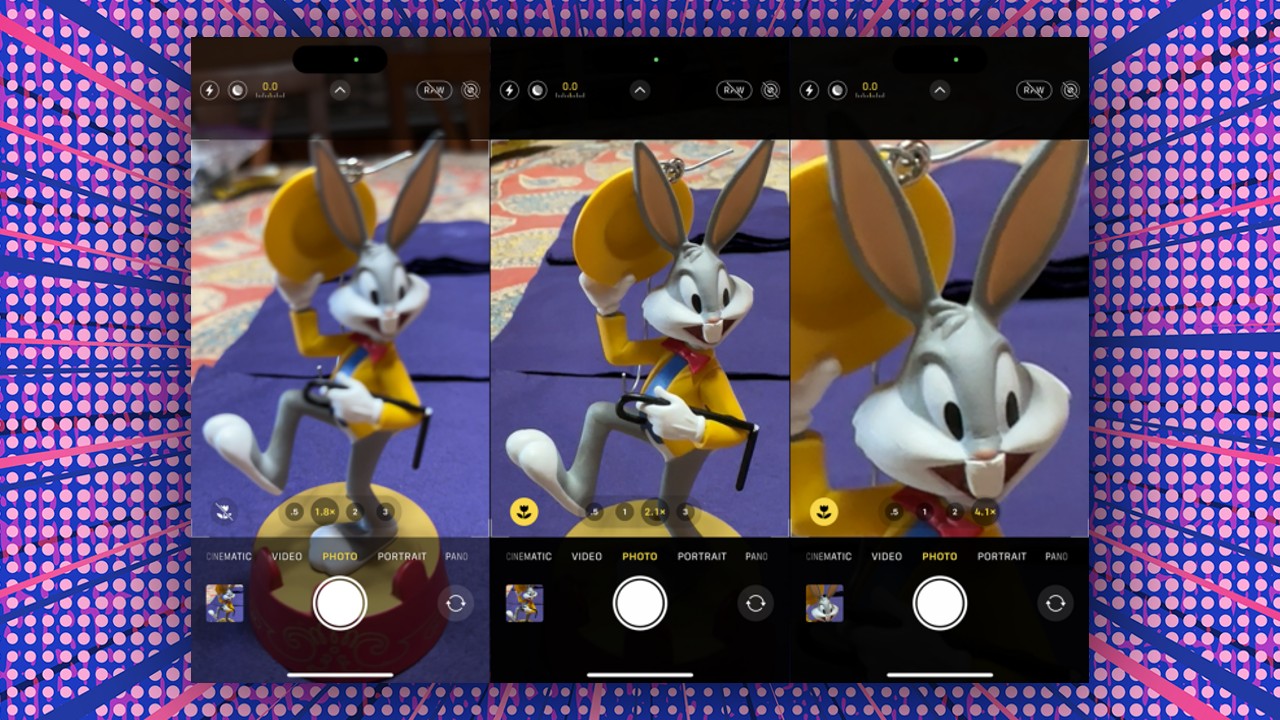
narrow a small object When you try to take a photo, the focus will likely go elsewhere and you won’t be able to get the shot you want. However, the macro control on iPhones, designed to take photos of close-up objects, helps eliminate this problem.
Take a photo to see what difference it makes when macro control is on or off. by tapping the flower icon that appears in the bottom left corner You can make it active or passive. You can even use this feature in slow or fast motion videos.
Change the aspect ratios of your camera.
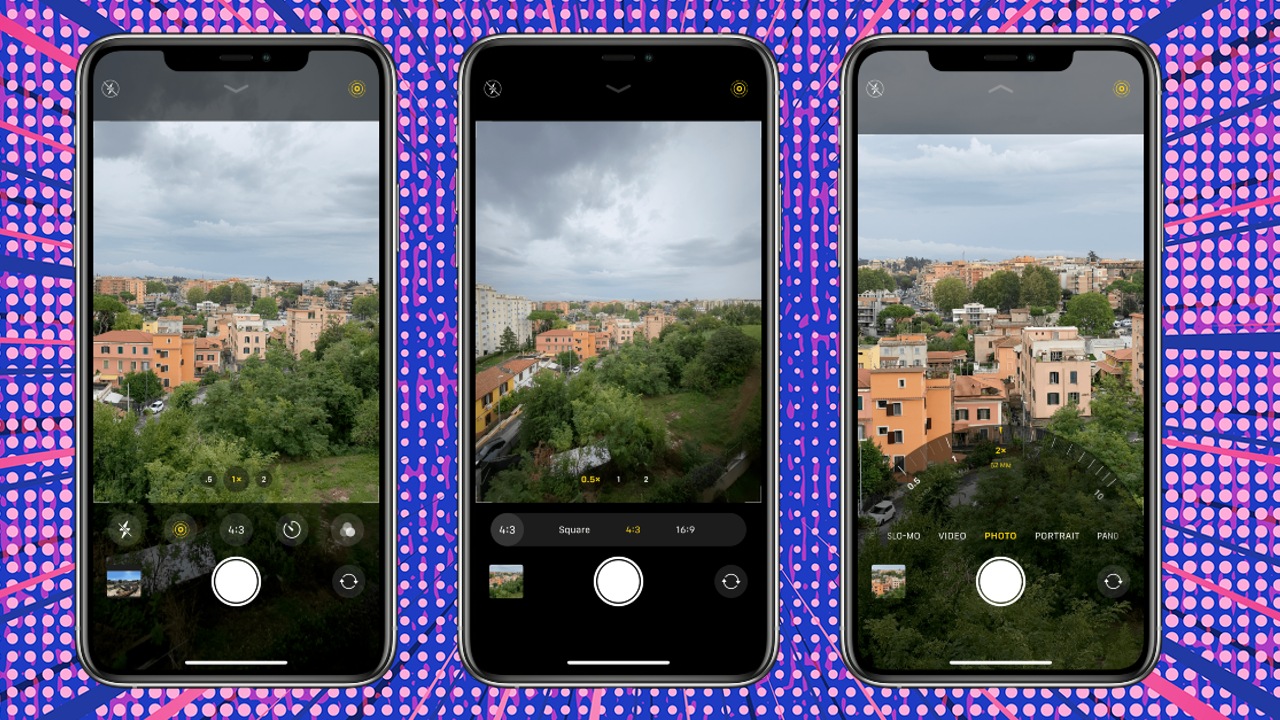
Set to automatic when you turn on the camera on iPhones a standard aspect ratioHowever, you can change this setting. For example, when you add a photo you took with your iPhone’s camera to your Instagram Story, the aspect ratios don’t match and you need to crop it somewhere or leave space at the top and bottom.
Actually, you don’t have to do this. When you take a photo with your iPhone, turn on the camera and when you scroll up You can change aspect ratios and make adjustments based on the social media platform you’re sharing the image on by following these steps:
Enter the camera. > Swipe up. > Enter the aspect ratio indicating 4:3 and select the desired ratio.
Enable the raster function to create a beautiful composition.
One of the most important tips for taking beautiful photos is positioning the photo frame correctly. You can use your iPhone’s grid function for this. When you enable the grid feature, a nine-part square is placed on your screen that provides a basic composition guide. rule of thirds makes it possible to apply it.
So how do you enable iPhone’s grid feature?
Settings > Camera > Grid
Unlock AE/AF.
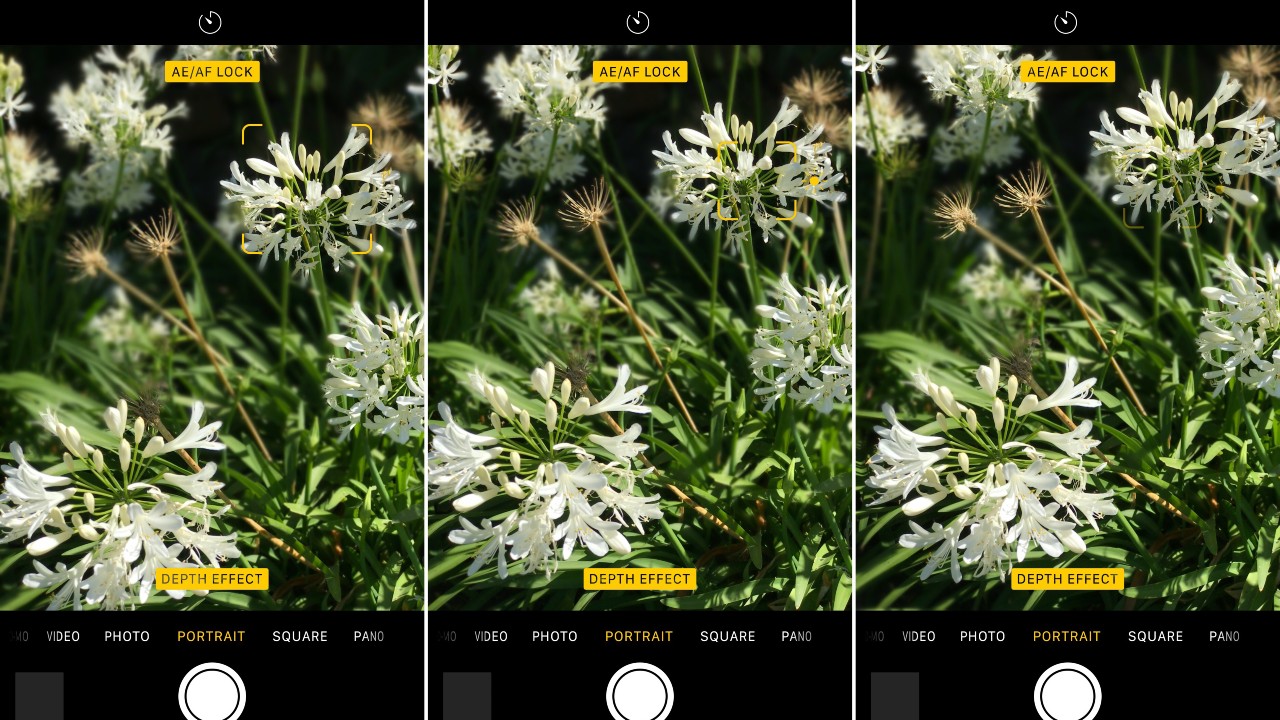
If you long press on your screen while in your iPhone’s camera app AE/AF lock you see the text. This allows you to lock the exposure (AE) and focus (AF) settings at a specific point.
After focusing on a subject/object, you can use this lock to maintain your focus and prevent camera shake. changing light conditions You can keep the exposure constant while you respond.
Adjust the brightness to the desired focal point.
While taking the photo, you can manually adjust the focus by touching the object you want the photo to focus on and sliding your finger up or down the screen from the touched point. brightness settings You can also change it.
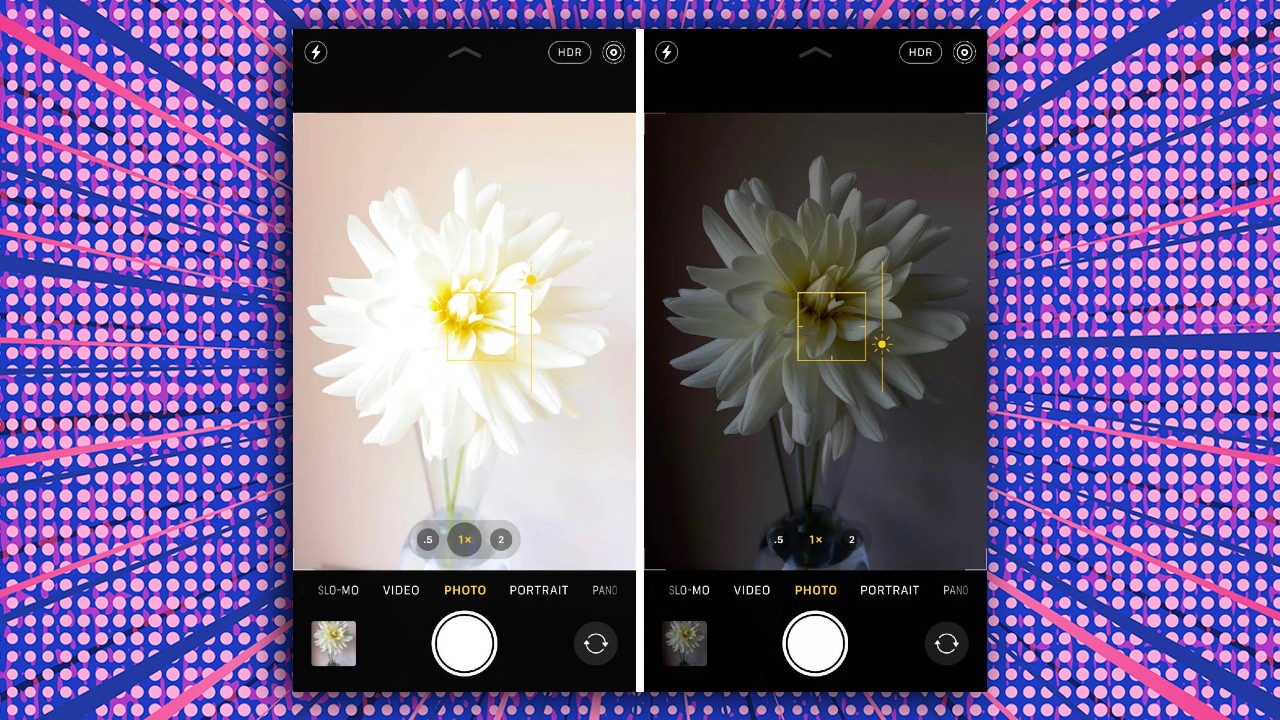
Use HDR correctly.
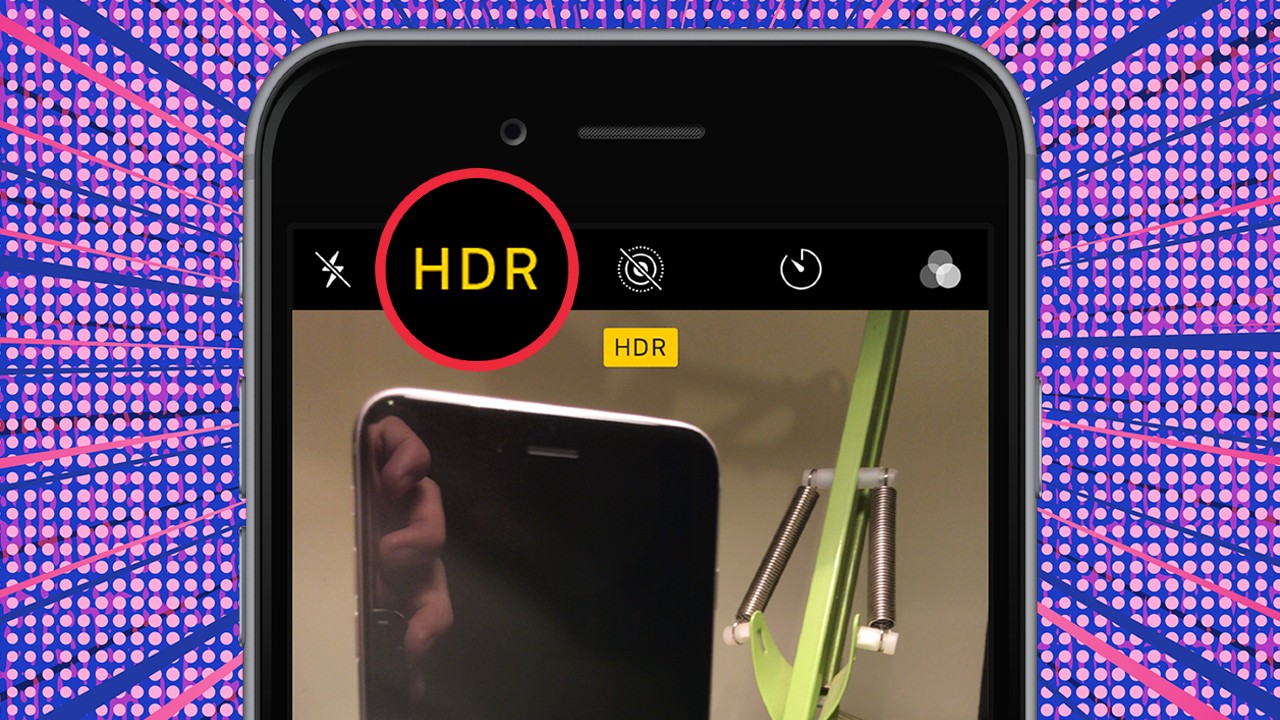
HDR (high dynamic range), This allows you to get better details and colors in low-light or overly bright images, but overuse can sometimes create an artificial image. You’ll get the best results by trying HDR on complex images and then comparing them to normal shots.
Enable the mirror setting for the front camera.
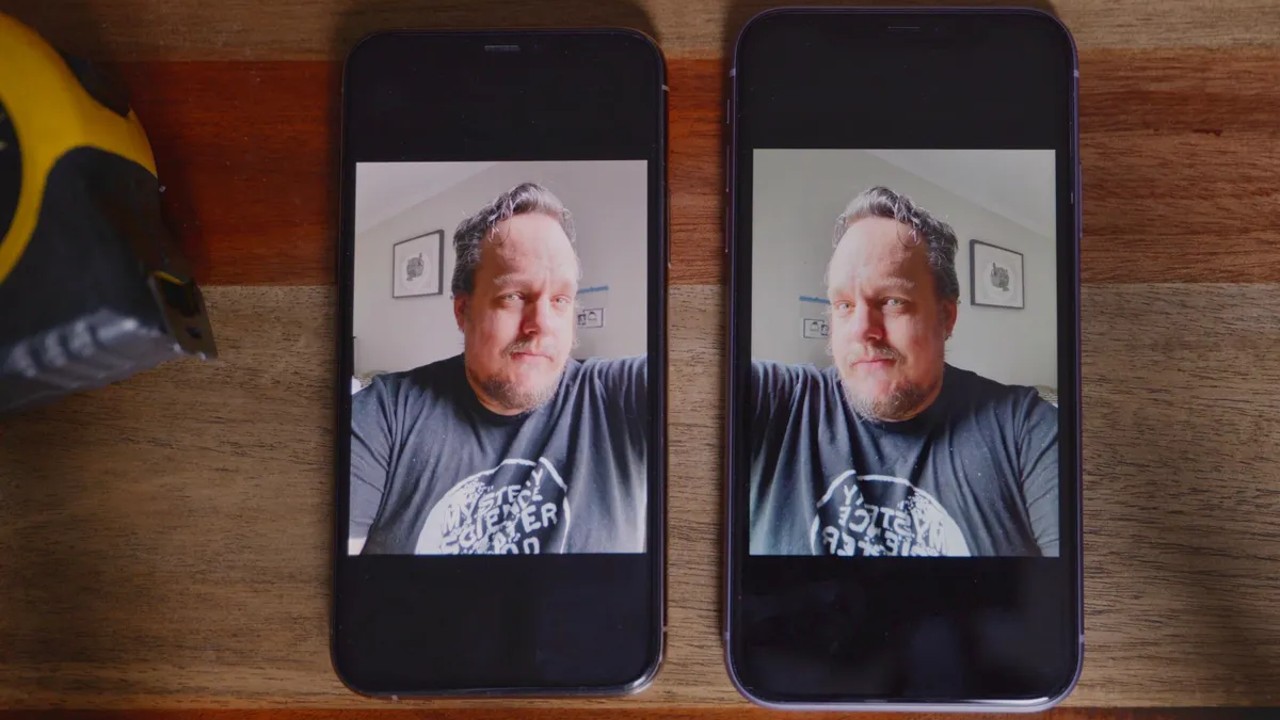
As many of us know, iPhones have an annoying feature. From the front camera, the image you see of yourself in the mirror but when you take the photo, the image is not saved with your reflection. For example, if you are on the right side of the frame when you take the photo, when you look at it after you take it, you will see that you are on the left side.
To avoid this situation, every time You don’t have to go into the photo’s settings and rotate it. If you want the selfies you take to always remain the same, here are the steps you can follow:
Settings > Camera > Front mirror camera
Use the Deep Fusion function.
The Deep Fusion feature on iPhone 11 and later models increases the level of detail in photos and improves low-light performance. Similar more vivid photos appears.
The working logic of Deep Fusion is as follows: to take a single photo, the phone immediately takes nine photo frames and after a long exposure it selects the best one and shows it to you. This feature is actually enabled automatically on iPhones, but only when the ‘photos taken out of frame’ option is active Deep fusion It can be passive. To disable the off-screen photos feature:
Settings > Camera > Photos taken outside the frame
Bonus: Keep settings.
If you usually take photos in the same places and in the same ways, you can keep the camera settings you previously made. Continuously, for example square rate If you are shooting, you can go to the settings, select the camera and activate the ‘Keep settings’ section. This way you don’t have to reset it every time you turn on the phone.
Here are all these features About taking better photos with iPhones tips to help you. Which of these features did you use or which did you learn for the first time? We’d love to see you in the comments!
Sources: Apple, Media Trend, Skylum, iPhone Photography School
You can check out our other content about Apple:
Follow Webtekno on Threads and don’t miss the news


