


Automatically tag your MP3s with Mp3tag
- August 20, 2023
- 0
I’ve been trying to remember the first time I used Mp3Tag for a while now, because I’m not sure if it was when I signed up for WebListen,


9621 Agnes Crossing, Lake Suzanneview, New Mexico Island 84604-9295.
I’ve been trying to remember the first time I used Mp3Tag for a while now, because I’m not sure if it was when I signed up for WebListen,

I’ve been trying to remember the first time I used Mp3Tag for a while now, because I’m not sure if it was when I signed up for WebListen, very early in the first decade of this century, or if it was a bit later. , when I did this with my first iPod, and of course I began to place much more importance on the MP3 metadata I added to iTunes to transfer from PC to player. In any case, roughly two decades have passed.
During years, For me, Mp3tag has remained the most reliable tool for managing both metadata and MP3 filenames. which got into my PC one way or another. It’s true that its design hasn’t evolved much since its inception, but the truth is that it didn’t even need to because it had a pretty successful design since its inception. And a very important detail, its Windows version is completely free.
There are several reasons why we may find MP3 files that do not have metadata., which significantly reduces their usefulness as many players use them to identify content. The good news is that with this application we can automatically get them from the Internet, apply them to files and even use them to rename files. In this way, we avoid the tedious method of doing it manually, file by file, because Mp3tag identifies entire discs, as you will see in the following example.
Let’s start from the base and tearing from the original Violator from 1990, where for whatever reason metadata was not added to the component tracks:
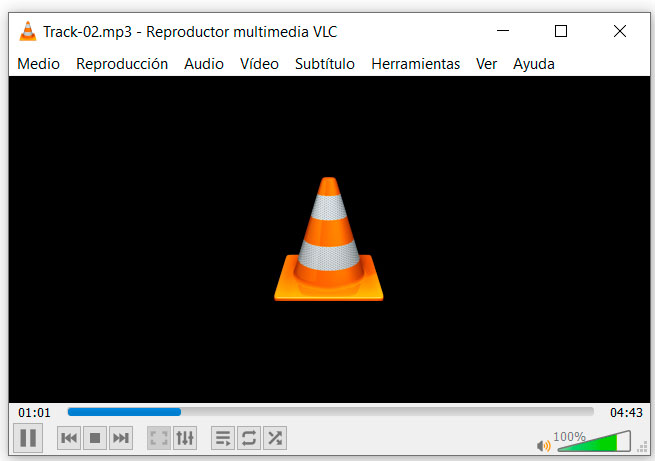
This way, when we play the files whether on PC or any other device, no information about them will be displayed.
And of course, much worse, we won’t have any information about the songs in the playlist view:

To solve this, of course, the first thing we need to do is to download Mp3tag from its website. Both the download and installation are completely standard, so simply download it, follow the installation wizard and you’ll have it ready to go on your PC in no time. Then double-click its icon (if you chose to add to the desktop, otherwise you can find the program in the Start menu). Be that as it may, opening it will reveal its main interface:
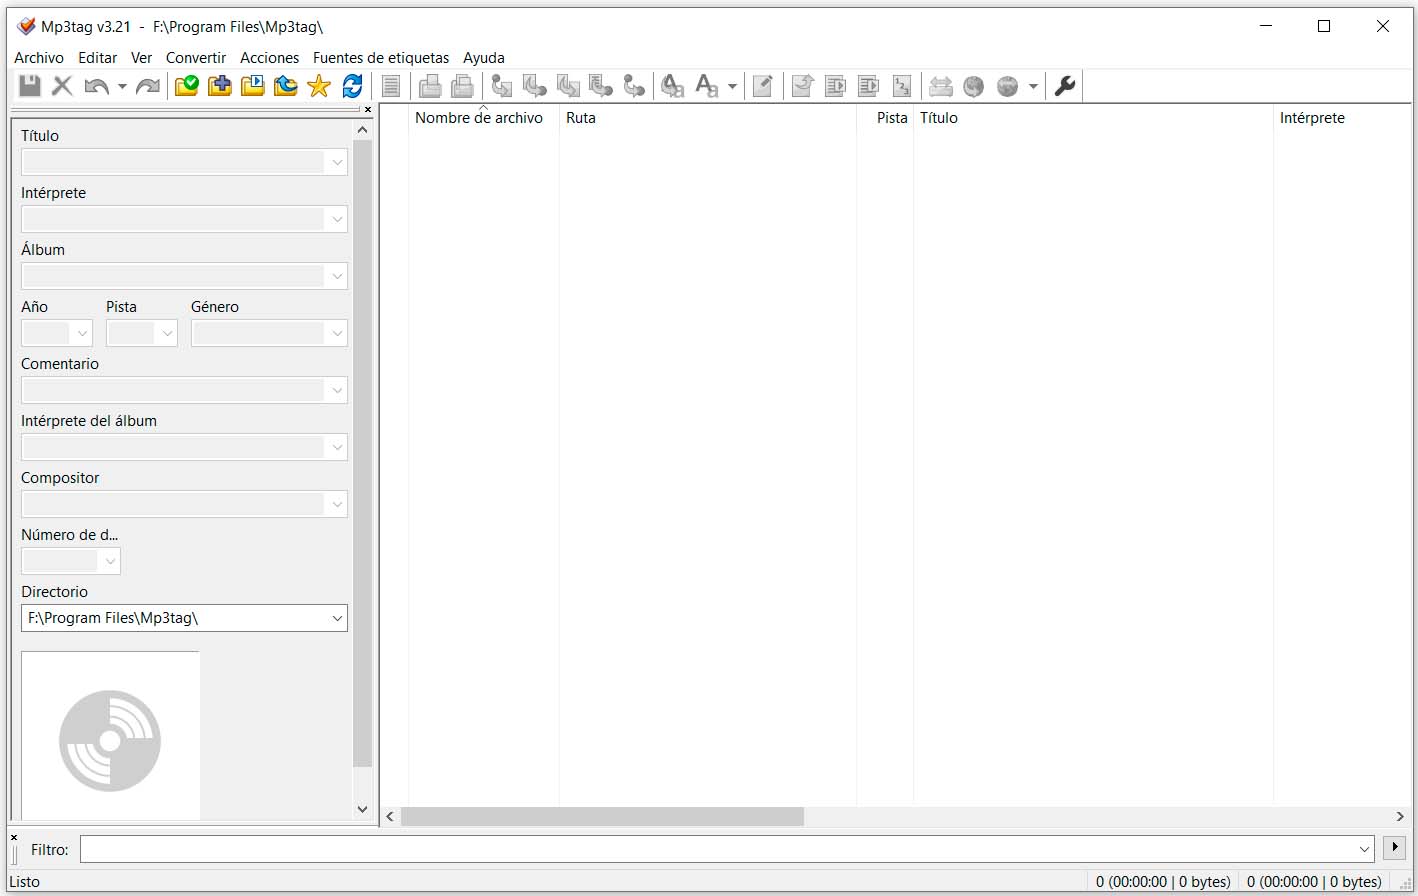
It’s obviously empty at the moment, but that will change soon as we add the MP3 files we want to tag. To do this, Mp3tag works directly with folders (and also allows you to add subfolders, although this is only practical in very specific circumstances, as we will be doing the disc tagging process). To do this, look for the icon for editing the selected directory on the top button bar. It’s a folder icon that has a white check on a green circle. Then, using the window that opens, select the file folder. Once you do this, these will already appear in the Mp3tag interface:
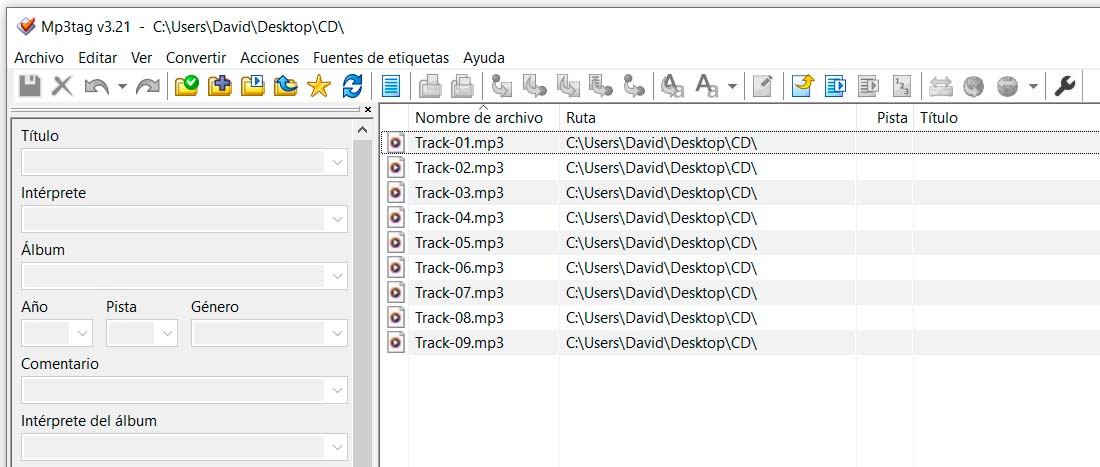
Of course, no information is displayed at the moment, but that will change soon. To do this, select all the files by pressing Ctrl and A at the same time. As you can see, the fields in the left section will become automatically editable. You can edit them manually if you’d like, but instead we’ll try to let Mp3tag get the information automatically from the internet.
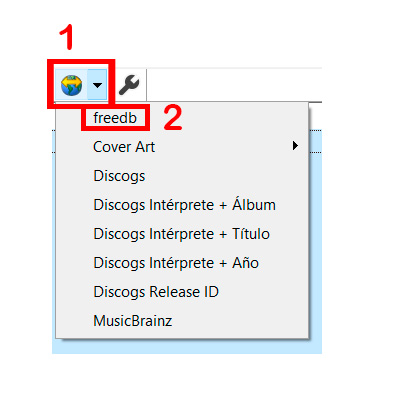
To do this, with all the files selected, click on the arrow that appears to the right of the button, search for information on the Internet (1) and in the menu that appears, click on the freedb item (2) .
Then in the dialog box that appears, choose (if not already) “Find from selected files” and click OK. This way, Mp3tag uses the track count along with the track duration to try to determine which disc it is, something it rarely gets wrong. Of course, because in many cases you will find several entries for the same disk, and sometimes you may also see a wrong identification, for example:
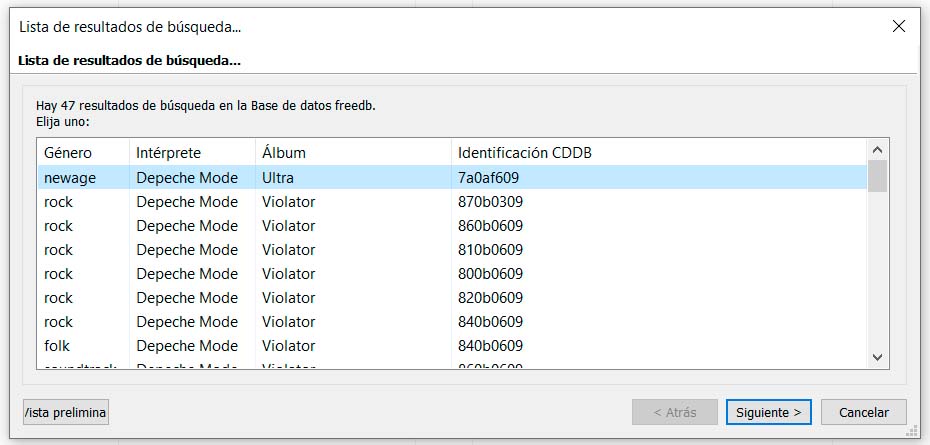
In this case, as you can see, the first entry in the list is wrong, and many entries for the correct disk are also shown. Choose one of them (in this example I chose the second one) and click the Preview button in the lower left corner. This will open Windows Notepad with the information from this entry:
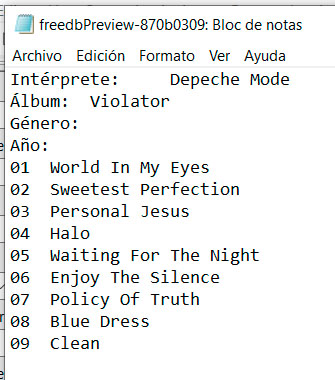
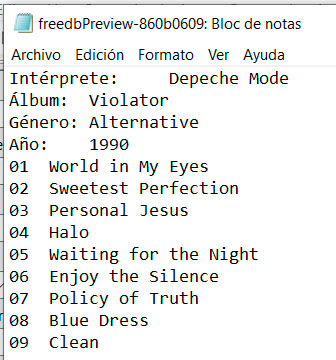
In this case, the displayed data is fine, but both the style and the year of the recording are missing. At this point, we can check the other items in the list in the same way or, if we want, enter this data manually. In my case, I chose to display the contents of the next item in the list, and here both dates are displayed:
Once we find the record we like the most, we can close the Notepad window (which is only a preview, so we don’t have to do anything with its contents) and click Next in the list window.
In this way, we will now access the data management window that we are going to add to the MP3 files:
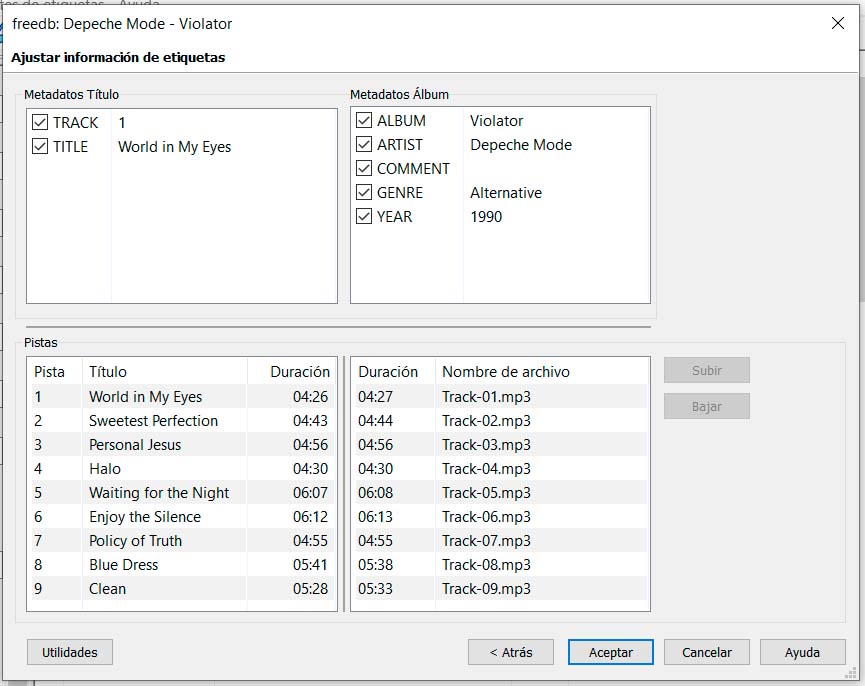
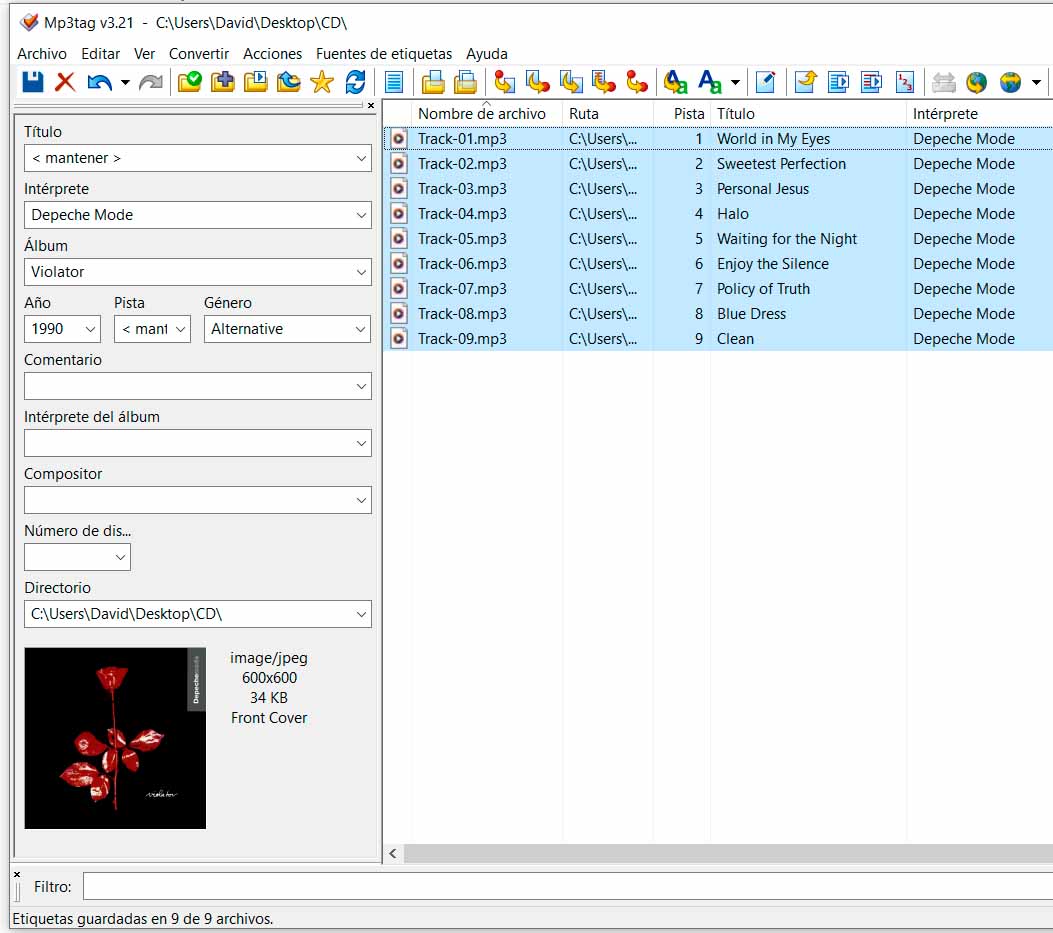
In it, we can make adjustments that affect all files, through the sections that are displayed in the “Album Metadata” frame (at the top right of the window) and also those that refer to a specific file. To do this, we select it in the “Tracks” section (bottom left) and edit it in “Name Metadata” (top left). When everything is adjusted according to our preferences, all that remains is to click OK and all the metadata will be automatically added to the files, as you can see in the main Mp3tag window:

However, if you wish, you can make adjustments, both on a specific file and on the entire disk. To do this, select a file or all with Ctrl + A and use the bar on the left to change what you want.
There is a kind of metadata that, while not necessary to organize music, significantly enriches it; pictures with the clearest and most obvious example of the album cover. You can also get them and add them to files directly from Mp3tag. To do this, select all the files again (you know with Ctrl + A) and repeat the click on the arrow that appears to the right of the Internet search button, but now go to Cover Art and in the submenu you want to be click on MusicBrainz.
Then a new field with search parameters (album and artist) will open. Since they will be obtained from the metadata you have already added, they will be correct, so just click Next. This will take you back to the window showing the possible results and like the metadata window it is also possible to view multiple records and you will also have a Preview button:

Here again you will need to use the Preview function to confirm that the correct image is associated with the selected record. After this confirmation, click Next to display the cover in the tag manager
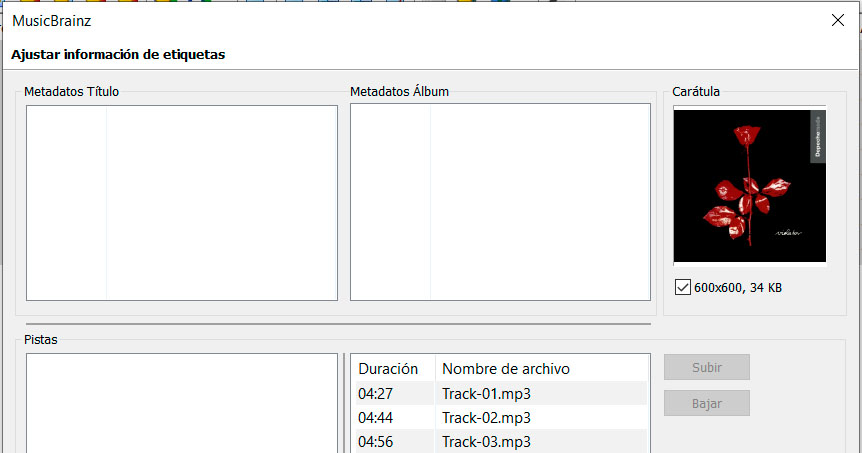
Since everything is in order, all that remains is to click OK and as you can see at the bottom of the tag bar of the main Mp3tag window, the artwork associated with each of the songs on the album will already appear.
This way your MP3s will already be tagged, so that’s the end of it…or is it? The truth is, you can still do something else: wouldn’t you like to use and also modify the name of the files to reflect their contents? Well, you can also do this with Mp3tag and it’s also extremely simple, but at the same time very flexible, allowing you to rename them exactly according to the format you like the most.
To rename files, start by selecting them all (as we explained earlier, you know, Ctrl + A) and then right-click on any of them, so that a context menu opens. In it, go to the Convert item and in the sub-menu that appears afterwards, click on “Label – Filename” to open this dialog
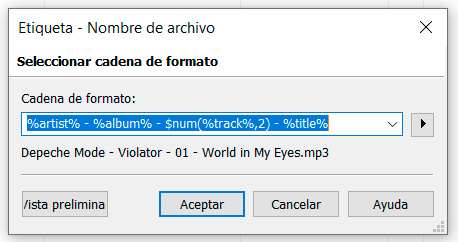
What is displayed in the “Format String” field is important here, as this is where you will define the dates and the order in which they will appear in the file name. By default, the formula “%artist% – %album% – $num(%track%,2) – %title%” is suggested, which, as you can deduce, will add the artist name, album name, track number and its title, all these fields separated from each other by a dash, with a space before and after it. The string result is displayed below the string input field.
If you wish, you can simply delete the proposed string and use the button shown to the right of the frame to select the elements you want to display. For example, if you just want the track number and track name separated by a single space, you can use the string “%track% %title%” or, if you prefer the track number to always be two digits, ” $num (%track%,2) % title%”.
As I already indicated, below the string editing box, when you apply this formula to the first of the files, you will see a preview of the result. However, whenever you want, you can click the Preview button to preview all of them with the current selection
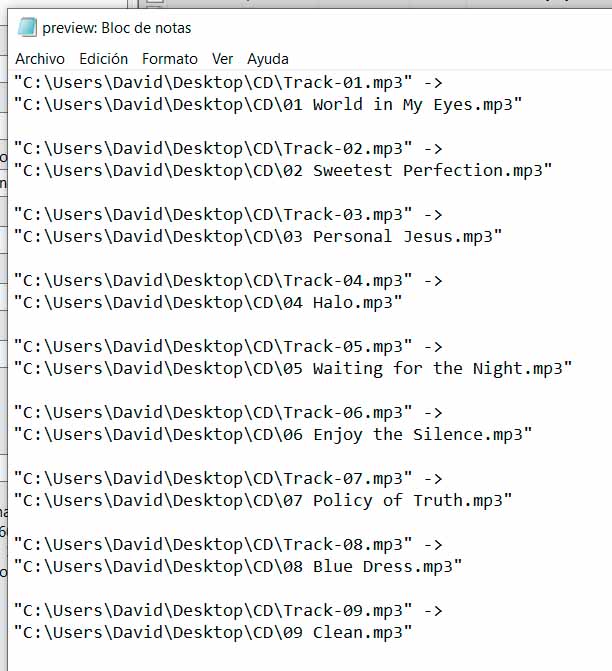
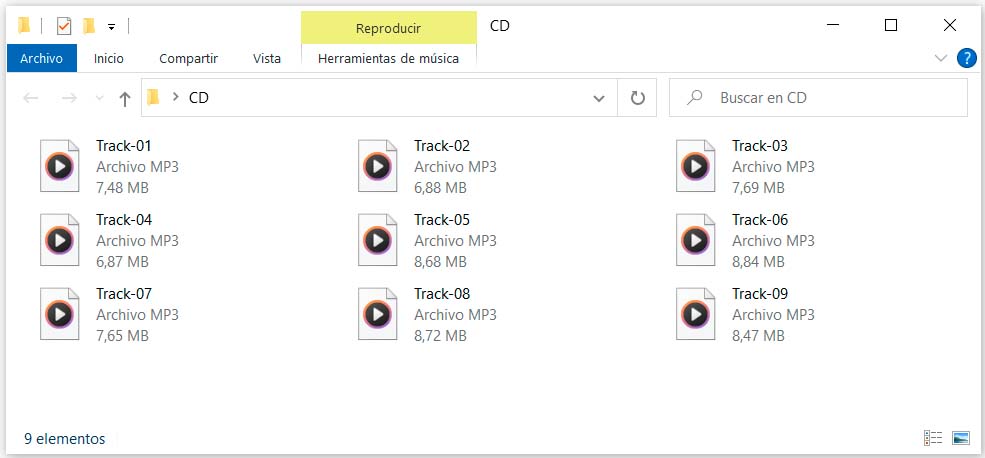
As you can see, for each file it shows its current name and then how it will be renamed if you use the current string. When everything is ready and to your liking, click OK. Now in Windows go to the folder that contains the files (remember how it looked at the beginning of this tutorial) and you can see the change:
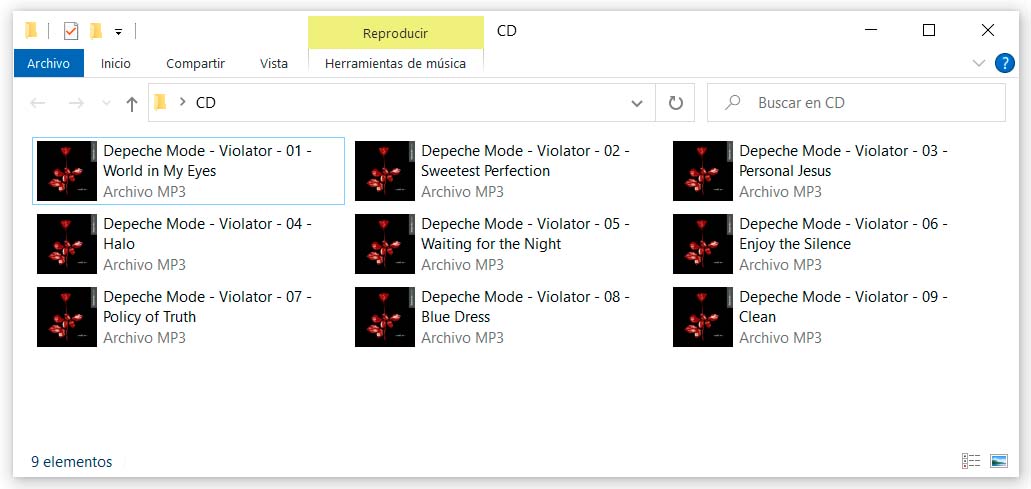
And of course, if you start playing it, as you can see, the data will already appear in the player of your choice:

Source: Muy Computer
Donald Salinas is an experienced automobile journalist and writer for Div Bracket. He brings his readers the latest news and developments from the world of automobiles, offering a unique and knowledgeable perspective on the latest trends and innovations in the automotive industry.


