Hyper-V is a native hypervisor that Microsoft offers for free to run virtual machines on Windows. It can be easily activated in professional, business and educational versions of Windows 11, but not in Windows 11 Home because it is not supported by default. There are tricks to activate it in the consumer version, as we will see in this article.
Virtualization is a valuable technological resource used for decades to virtualize software, hardware or networks. It is widely used in enterprise environments and also shows its value in consumer environments for software virtualization, running operating systems other than the internal machines we work with, testing software, or running incompatible applications or games without having to touch the main system.
In essence, the main operating system acts as a host and provides some of the hardware resources to the virtual machines. To accomplish this task, we need a specialized application known as a hypervisor. There are several types and they work differently, but the goal is the same: virtualize resources as a fast, convenient and secure way to run software. Because each virtual machine runs in an isolated environment, this technology offers tremendous flexibility to run different operating systems and applications on the same physical machine.
Hyper-V and Windows 11 Home
Hyper-V is a native Windows hypervisor and although there are higher capacity alternatives (VirtualBox, VMware Workstation Player …) excels in its integration with the systemits ease of use and its ability to run directly on the host computer’s hardware without the need to install additional software.
The problem is that Microsoft only officially supports it in the Windows 11 Pro, Education and Enterprise client versions, and omitting Windows 11 Home, which we must not forget, is the majority, because it is a version that OEMs generally use in pre-installations of new equipment. There are tricks to enable this in this version as you will see in this tutorial. Here we go.
Enable virtualization in the BIOS
Modern CPUs include hardware virtualization features that help speed up virtual machine applications. For AMD processors, this feature is called AMD-V, and is compatible by default on compatible models. This is different with Intel processors, and it is common for a feature called Intel VT-x to be disabled by default. Hyper-V needs to enable this feature. If you haven’t already done so, follow these steps:
- Restart the PC and enter the BIOS / UEFI. If you do not know the passkey, see this guide.
- Every firmware is different, but in general you should look for something like “Intel VT”, “Intel VT-x” or “Intel VT I / O”, which are older motherboard designations.
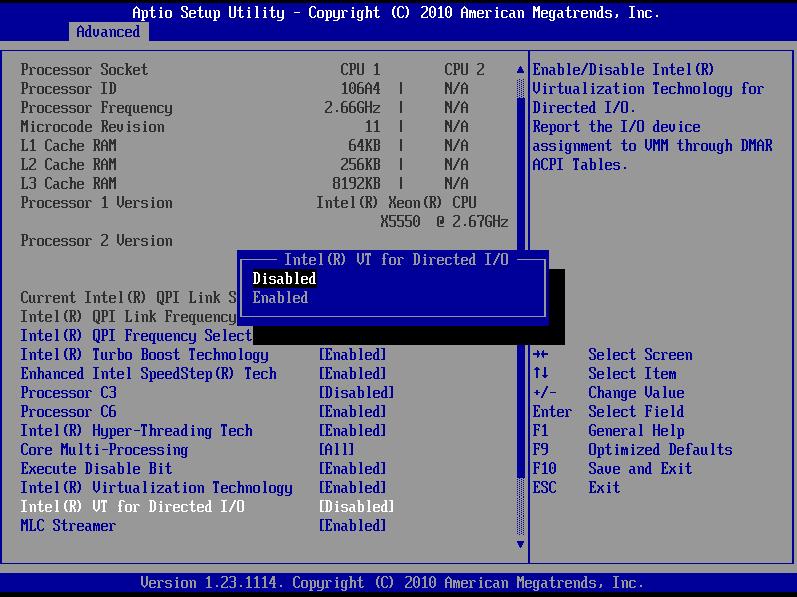
- You can find it on newer boards as “Intel Virtualization”, “Virtualization Extensions” or “Intel Virtualization Technology”.
- In any case, it is only a matter of activating it, saving the configuration and restarting the PC.
Create and run this script
Once we are in the operating system, we will create a batch file that will take care of the Hyper-V installation. As follows:
- Open Notepad from the Start menu> Applications. Or right-click on the desktop and create a text file.
- To create the script, copy and paste the following text:
pushd “%~dp0”

dir /b %SystemRoot%

ervicing\Packages\*Hyper-V*.mum >hv.txt

for /f %%i in (‘findstr /i . hv.txt 2^>nul’) do dism /online /norestart /add-package:”%SystemRoot%

ervicing\Packages\%%i”

del hv.txt

Dism /online /enable-feature /featurename:Microsoft-Hyper-V -All /LimitAccess /ALL

pause

- Save the file as hyperv.bat.
- Right-click the file and run it in administrator mode.
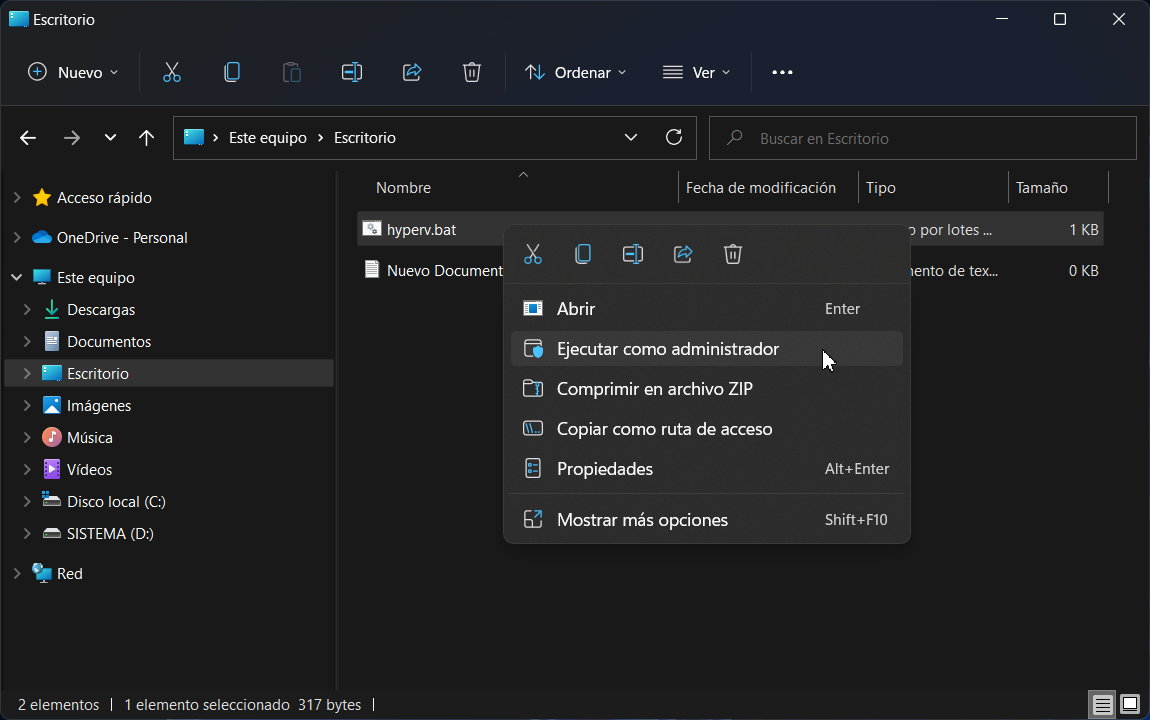
- The script opens a command prompt session and installs Hyper-V on Windows 11 Home.
- When done, a warning and permission to restart the computer will appear.
- You should already have a hypervisor installed after the reboot. Type Hyper-V into Windows Search and create a new virtual machine.
How to use Hyper-V in Windows 11 Home
If you are familiar with virtualization programs, working with Hyper-V will not cost you any effort, as it is very similar to other commercial software, such as VirtualBox or VMware. We will leave you step by step with the basics as this tool goes a long way. The first thing is to create a virtual machine as follows:
- Select your local “Desktop” computer and you will see the available options.
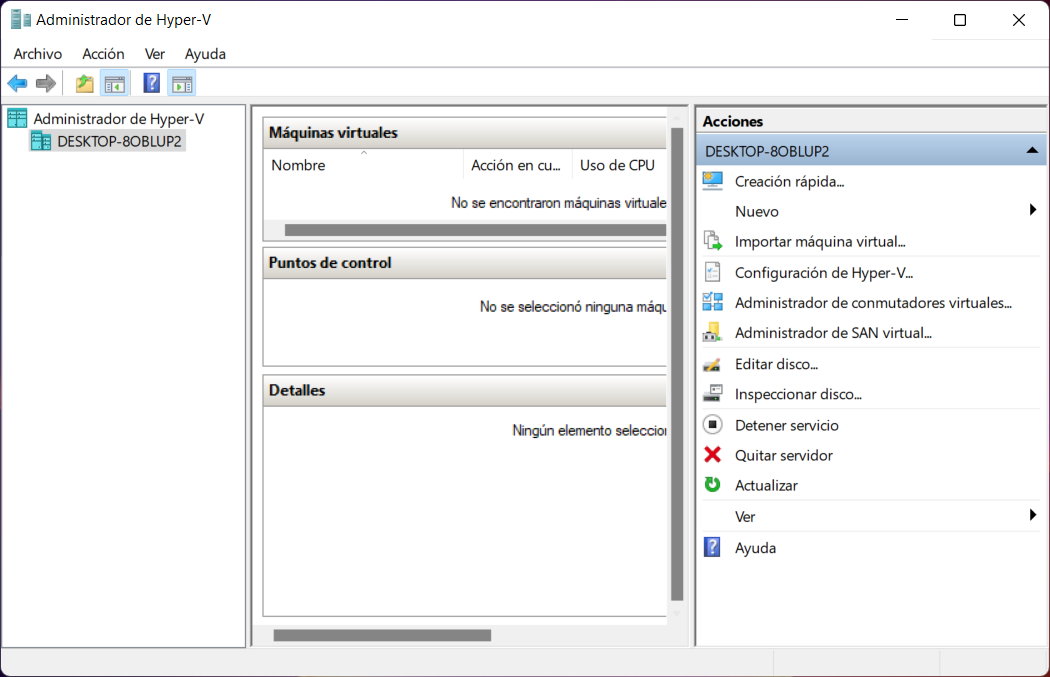
- You can use the “Quick Create” wizard or click New> Virtual Machine.
- You will see several preinstallations available, including Linux.
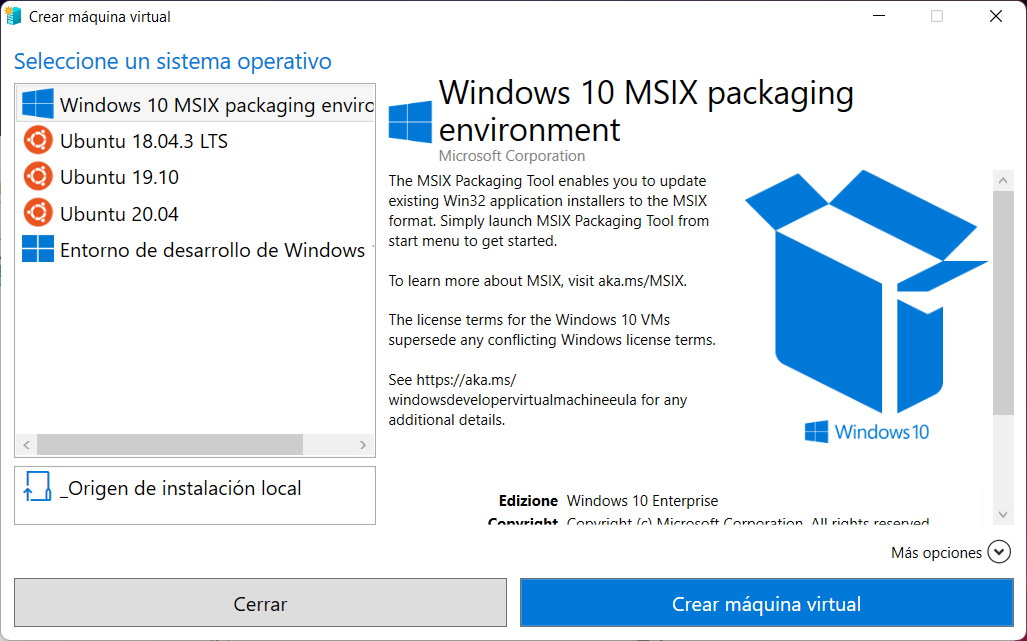
- For example, we’ll select a quick guide and select the image we downloaded earlier.
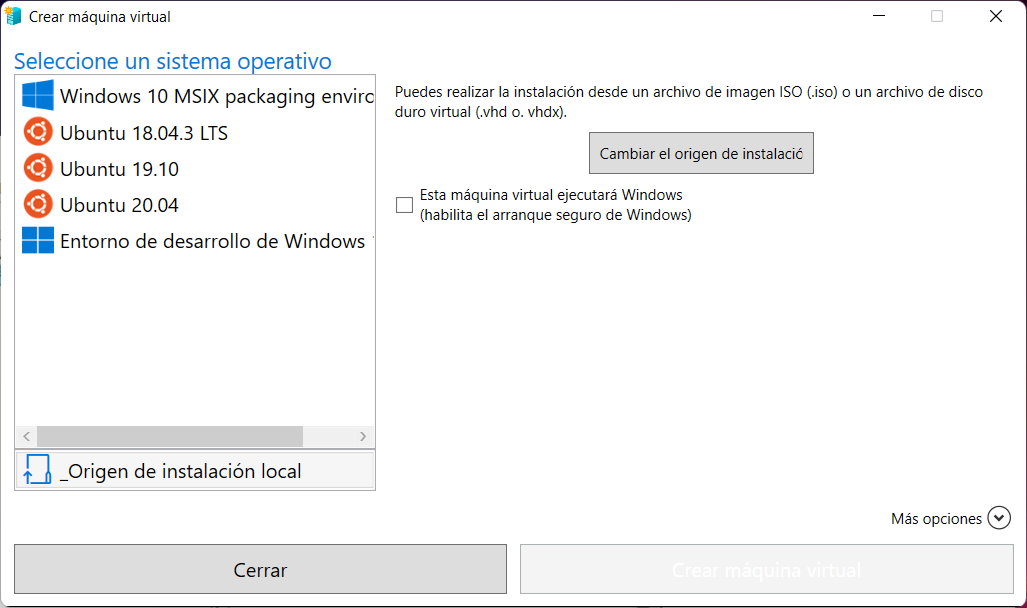
- We will select the local installation source and specify the ISO of the system we will install. We have chosen Ubuntu 22.04 for this example, but you can choose other distributions or other Windows.
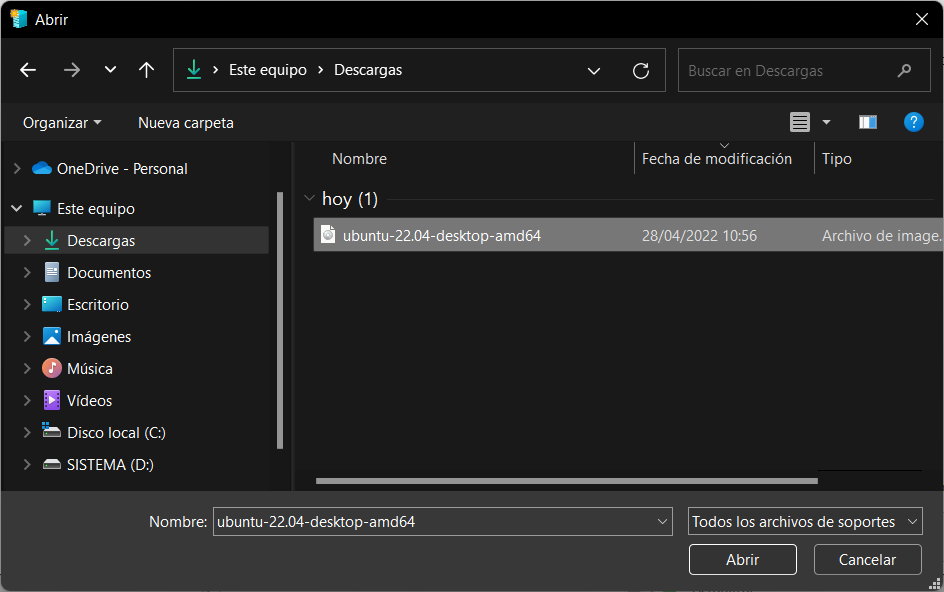
- Name the computer, clear the Secure boot for compatibility check box, and then click Create Computer. You’ll have it created in seconds.
- Before connecting, we must “adjust the configuration”, select the disk space, memory and processor parameters that we will allocate to the machine. Remember that the more hardware you can assign to it, depending on the level of your team, the better the experience.
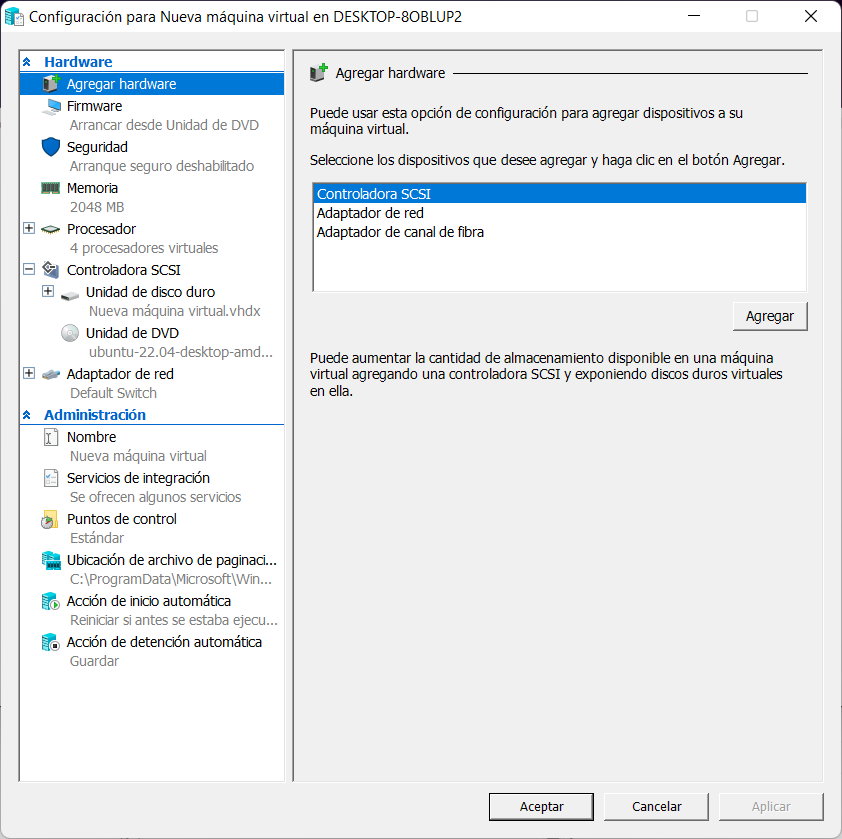
- Once the resources are allocated, click mount and run the Ubuntu installation in the same way as we would with a local installation.
- Or try the distro in live mode, which is the method we chose for the example.
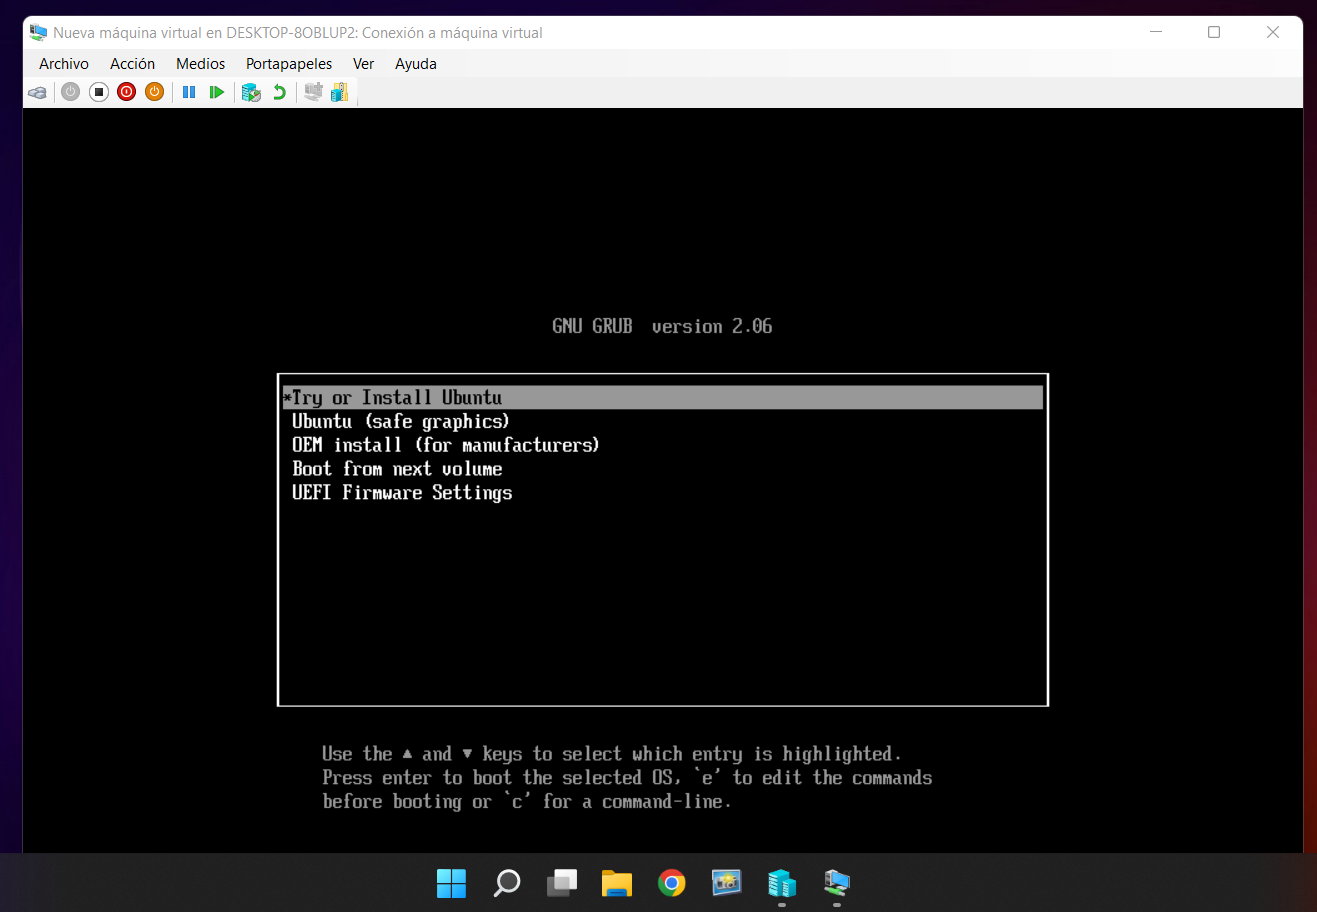
Here we go. Utilizing virtualization, Ubuntu 22-04, a technology resource we repeat, is very valuable, fast, convenient and secure for running software. Also in Windows 11 Home, although Microsoft does not support it by default.
And in Windows 11 Pro?
Even simpler, because Microsoft hypervisor is supported by default in this version:
- Make sure you have the CPU virtualization capability enabled in the BIOS / UEFI, as shown above.
- Enter the PowerShell console as an administrator and run the command Enable-Windows OptionalFeature -Online -FeatureName: Microsoft-Hyper-V -All.
- If you are not using a Windows console, you can also do so in graphics mode. Go to Control Panel> Programs and Features. Click “Turn Windows features on or off.” Find and check Hyper-V and install it.
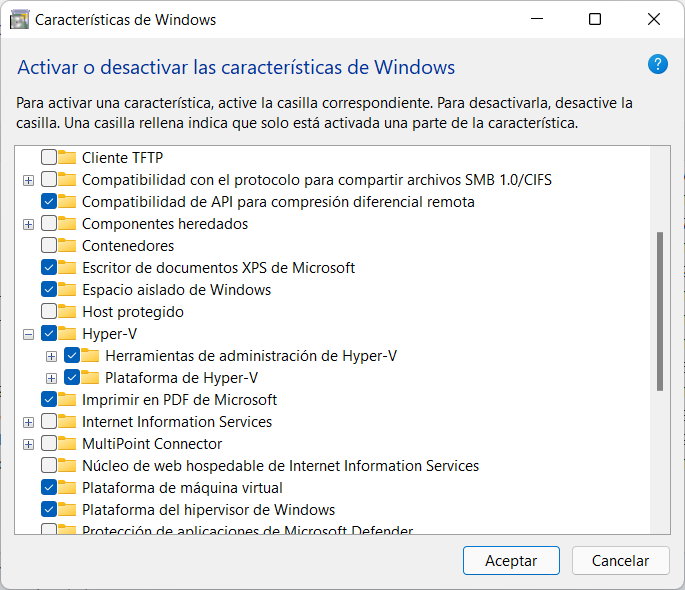
The wizard will search for the necessary files and install the program. You will need to restart your computer to complete the system installation and upgrade. From here, a whole world of possibilities opens up to you. If you have a good host computer, you will be able to give up the amount of resources necessary to run well-experienced virtual machines.
